Quantcast
Channel: Cards and Crafts
Viewing all 609 articles
Browse latest View live

Handmade Roses Photoframe

$
0
0
Handmade Photframe 1
Handmade Photoframe
        Dear friends Thank you so much for the sweet comments on the Quilled photoframe my daughter and I  made for teacher's day. Though she wanted to gift 9 teachers this year ,we got time to make only 6 photoframes .This is one of the desktop calendar recycled photoframes we made for this year's teacher's day. 
Handmade Photframe 3
Handmade Paper rose
Made the paper roses and leaves from textured paper using the Spellbinders Rose creations die and the diamond vines are bits salvaged from my old dress.The pearly leaves are beads I picked up from a a local fancy store and they are a favorite embellishment of mine! 
Handmade Photframe 2
Handmade Photoframe
I love the texture that corrugated paper lends to any project and corrugated paper is my all time favorite to use in making Photoframes! When I made this one I felt it looked very sophisticated. I actually made this one at night when my daughter was asleep.In the morning my heart sank when kiddo exclaimed that it looked so dull!! Maybe I should have chosen brighter and popular colors since I was gifting to her teacher! What do you think girls ?

Supplies : Dies:Cheery Lynn  Butterfly,Spellbinders Majestic Labels 25, Spellbinders Rose creations,Memory Box rounded fence
Linking  to Cheery Lynn  ,Just us girls  257 sep 11 [Leaves],Suzy Bee's bloomin 45 sep 12, Craft Hoarders 15 [ flowers]

A Strawberry Garden Drawer Box

$
0
0
Drawer Box
Dear friends Thank you so much for the morale boosting comments on the handmade rose photoframe..... I was so unsure about the colors in that project! Sharing yet another project made with corrugated paper - a dresser box with  a strawberry garden!
Drawer Box
          This is my Guest DT post for Tuesday Throwdown using a super sweet digital image from  "A day for daisies" I colored the sweet fairy and strawberry fruit cake with Staedtler watercolor pencils and used an "Artline" Metallic silver pen to highlight the cake outline and strawberry spots. I gave a shimmer to the fairy's pink dress by applying pink glitter glue over watercolors.
Fairy
I used puffy paint over the frills of the little fairy's dress and on the yellow fruity gems on the cake.If you have never used puffy paint ,you must - I guarantee that seeing the paint puff up on heating is sure to delight the child in each of us!! [If you don't have a heat gun, here is another way to use puffy paint : Mermaid diorama]
Clay Strawberries
Propped up the image on a grassy platform made by layering nesting ovals on foam tape and adding bits of grass all around.Made some felt flowers with chunky glitter centers to add to the magic of the fairy's strawberry garden!
Felt Sunflower
The challenge at Tuesday Throwdown requires using 1 image, 2 papers [I interpreted as 2 types of papers- corrugated and pattern paper ] and 3 flowers. My 3 handmade felt flowers are on the 3 sides of my drawer box.
Felt sunflowers
The green corrugated paper tube behind the image serves a dual purpose- it helps prop up the image securely and also serves as a pen holder!
Clay Strawberries
What is fairyland without a little elf joining the fairy for tea! The cute elf is a bit of recycling [ salvaged from my daughter's broken hair-clip!] and the bronze kettle is a charm from Crafters Corner.
Clay strawberries
My little girl helped me make the clay strawberries from Amos clay - these dry super-light and non-sticky and hence are ideal for paper-crafts! [You can also see clay strawberries in this Punchart Photoframe].Made the trellis for the strawberries by using 3 die-cut layers and adding lots of stamped leaves.
Clay strawberries
The collage below shows how I made the shaped dresser box.The outer framework of this drawer box is a cardboard box which I recycled by lining with corrugated paper. I used thick Ivory card to make a  draw to fit inside it  by doing a lot of measuring and designing using my scorpal!

Box making
I didnt have a cute knob to use on my draw so secured a foam bow with a brad to the draw to help pull the draw out easily.
Shaped Box
My regular readers will know I am a big fan of foam.In this project , I used foam as the dresser knob as unlike paper it can handle quite a bit of squishing and rough handling . This dresser is going to be used by  my little girl !
Drawer Box
I hope you liked my little fairyland on a dresser box!This is a fusion of paperfoam, felt and clay!!

Supplies :Dies : Lifestyle Crafts Circle, Lifestyle crafts Bow,Couture Creations Oval, Cheery Lynn grass, Cheery Lynn Sunflower,Poppy stamps trellis, Heartfelt creations Leaf;Stamps : Heartfelt creations Leaf , A day for daisies digital stamp;Clay : Amos cay; Papers: Prima Introspection [ from Crafters Corner] ;Misc: Kettle Charm [ from Crafters Corner],Heart pearl beads, Chunky glitter.

Linking to Scorpal Fun Storage Ideas Sep , Not Just Cards ch 1 sep 14 ,Luna girl Moon Beams  sep 14[fairies],Flitztown 52 sep 21, Crafty bloggers Network Sep, Live and love crafts 27 Sep [ things with wings],Craftin Desert Divas Sep 14 , Penny's Challenge 193,Crafters Cafe 80  sep 10[child's birthday],Try it on Tuesday  sep 25[ how does your garden grow], Moo Mania  Sep 9 [ recycle]

3 D Chariot Making

$
0
0
Handmade Chariot 1
3 D Chariot
       Those who follow my blog  will agree that my creations generally fit into the cute category and I hardly ever make elegant projects so I was quite at a loss when Shalini the owner of Crafter’s Corner sent me a beautiful Marianne Petra die set to use in my DT projects. I had never mustered the courage to buy these type of dies before  as they looked so elegant but intimidating!
Handmade Chariot 2
Princess Carriage
           But as many  of you know I have a little girl who is very much into princesses and fairy tales and so I used the Marianne Petra Corner Die set  to make this glittery pinkish 3 D chariot !
How to have Fun with your Dies
Fun with dies
I learnt a few lessons when I got to play with this intricate die set so let me share my experience on how to get the maximum potential from intricate stencil- emboss style dies such as the Marianne or Spellbinders dies!
Handmade Chariot 7
Marianne Petra Die
The  set had 5 beautiful dies, but I was disappointed to see the die cut didnt actually wow! I knew I was missing something!
Handmade Chariot 8
Marianne Die
Inking seemed to help beautify many a project ,so back went the die cut into the die, and sponged the diecut using the die like a stencil.
Handmade Chariot 9
Inking Diecuts
Looks so much better doesnt it!! Ha Ha I did feel foolish and clever at the same time[LOL!!]. Many dies are actually meant to be inked-- so my adivse to newbies and not so newbies like me who are a tinge lazy , dont hesitate to bring out those inkpads to your dies!
Handmade Chariot 11
Embossing with Dies as stencil
           I just recently got the Ranger heat gun and have been having so much fun heat embossing so of course I had to try heat embossing the intricate die cut. With the die cut still in the die ,run your watermark pen on the design[easier than freehand drawing on the die cut], pour clear embossing powder,remove the die  and heat with your heat gun.
Handmade Chariot 13
Heat embossed Die cut
Dont you just love the shimmer and texture! You can directly use the watermark pen or even run the embossing ink pad on the die-cut while its in the die and omit the inking step but if you do that tiny errors will show up more! If you ink and emboss- most errors are hardly noticeable!
Handmade Chariot 15
Die cut layering
To jazz it up a bit more- make your die cut literally pop by layering it! This set had 2 matching outline dies and I popped up the intricate die cut atop its matching outline using foam tape.
Now on how I made the 3 D Chariot
If you dont have this particular Marianne design--not to worry-- the purpose of the step by step photos in this post is just to show how you can play with your die cuts and  use them to their maximum potential!
Just play with your die cuts like you would do with a jigsaw puzzle- rotate and match and also cut a bit here and glue a bit there and you can make entirely new designs!
Handmade Chariot 16
Die cutting tips
The pic above shows the die cuts from the Marianne Petra corner set I used to make the body of the chariot. As I said Rotate  a little,Cut a little, Glue a little, and you get new designs!
Handmade Chariot 17
Fun with Dies
I used Spellbinders Asian accents die cuts [again inked and embossed] to make the wheels.You could of course use circles or whatever lovely die cut design you have to serve as wheels [See an easy Chariot Shaped Card made with Scallop Circles: Chariot Shaped Card tutorial ]
Handmade Chariot 18
3 D chariot
Joined 2 of the above 2 dimensional chariots using a folded rectangular piece of card stock
Made a roof  using 4 of the 3rd die cut design inked and embossed in white this time
 I joined 2 Spellbinders Majestic labels 25 die-cuts to make the steps [seen in the earlier photo of the chariot] and the seat within the chariot
Handmade Chariot 4
3 D diecut chariot
I rolled up some  paper rolls to  to connect the wheels of the 3 D chariot!
Handmade Chariot 5
3D Chariot
         I hope you enjoyed the run through on how you can have so much fun with your dies. I know I have shared fairly simple ideas for the seasoned crafter but hoping it will help at least a teeny bit to many!
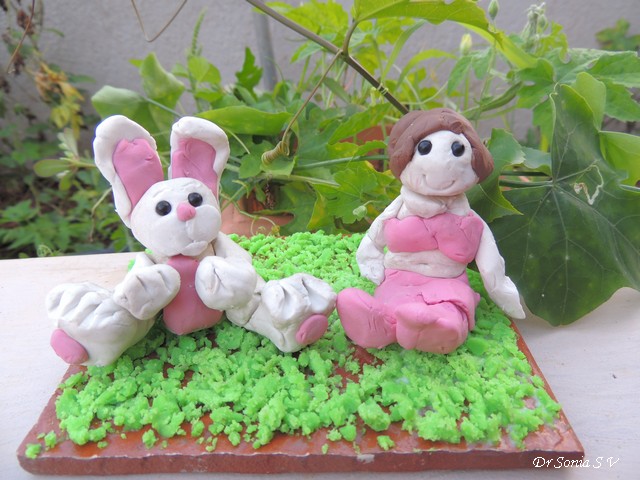
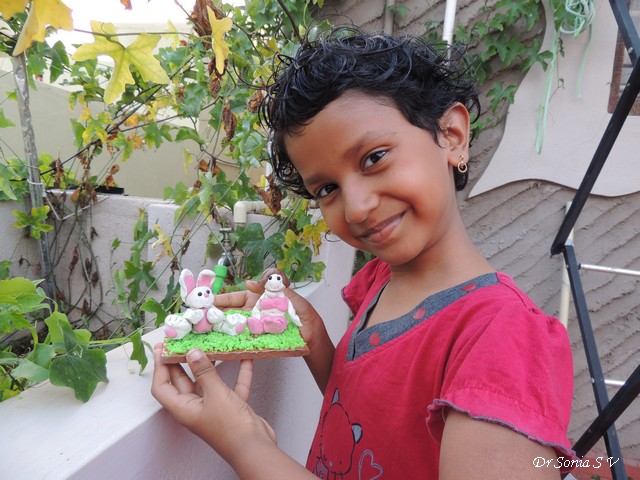
Currently the chariot has been hijacked by my daughter and her numerous princess dolls are enjoying  riding in it!!
Supplies
Embossing : Versamark Watermark ,WOW Clear Embossing Powders
Dies: 4 dies from the Marianne creatable Petra Corners ,Spellbinders majestic Labels 25, Spellbinders Asian Accents
Linking to WOW Embossing Powder [ My favourite is making 3 D projects and using dies...now all embossing techniques are quickly becoming a favourite!], Marianne design divas , Imaginations [ Embossing],Crafting by design Sep 16 [ Pretty  in Pink], Divas by design Sep 16, Paper Shelter 173 [ embossing],Whimsy Stamps Challenge  75 Sep[monochromatic], Marianne design Kreadivas, All crafts Sep , Melonheadz  sep 14[ 2 or more dies], Lexis creation Sep 13[Sparkle and Shine] 

Teachers Day Gift -Photoframe

$
0
0
Punchcraft flowers 1
Handmade Photoframe
             Dear friends sharing a simple photoframe we made by recycling another desktop calendar for Teacher's day [Tutorials : Photoframe tutorial 1Photoframe tutorial 2Photoframe tutorial 3Easy Picture frame tutorial ].Its a fairly simple frame with just a few die-cuts, a lace fashioned into a heart and some quilling.
Punchcraft flowers 3
Handmade Paper flowers
The large pink flower [made using a Sizzix die and this tutorial : Easy Paper Flower tutorial] was chosen by my kiddo and adding the pink quilled elements on the corners of the frame was also her idea!
Punchcraft flowers 2
Handmade Photoframe
In this post I am also sharing a bit of my crafty happiness with you -the past few days have been super lucky for me in blogland- my  3 D chariot won at the Marianne Dies Challenge, The Roses Photoframe won at Cheery Lynn Dies Challenge, My Fairyland Diorama was top 3 in 4 challenges and my Fairyland Pop up card won at Create something Catchy challenge.
Blogland is also so super encouraging to young crafters and I was so thrilled my daughter's Clay Diorama was top 3 in Brown and Sugar Sea theme challenge and also featured crafter at Anything but a card!
My daughter's Egyptian Mummy was featured at Crafty Gossip Party Ideas and was handpicked winner at A girl who crafts !
And not just the challenge wins and top 3s...I am so thankful that you  my blogger friends leave so many wonderful encouraging comments on every post...So blessed to have such amazing warmhearted blogger pals!
Supplies : Dies : Spellbinders Majestic labels 25,Heartfelt creations Leaf,Sizzix Flower layer 2
Linking to ABC challenge  Sep 27[ tic tac toe- I have used Flowers , Lace and Dies], Card and scrap 82 sep 28, Alphabet Challenge Sep 28 [P for pretty petal],Scrappers delight 31 [ make our own flowers]Sailing Pineapple Sep 23[ use a die cut],Scribble and Scrap Sep 26

Faux Tiles and Foam Bows

$
0
0
Foam Crafts 2
Faux tile Technique
Dear friends ,Thank you so much for the wonderful congratulations [on Facebook and my blog]!!
For my Guest DT project at Tuesday Throwdown  , I was sent a beautiful colored picture called Spring Blocks from Deedee's Digis featuring lovely crocus flowers and had to use it to make a project in the theme “Bows and Butterflies”.
I wanted to highlight the image and tried out a “Faux Tile” technique [inspired by my most talented blogger friend Valerie Ann aka Mrs A]. Most faux tile techniques involve cutting the image into squares and adding glossy accents for the shine.
In my country [ my Indian crafty friends will agree I am sure], its not easy to get craft supplies and so most of us hoard our supplies like crazy! I have been managing with a small bottle of glossy accents since 2 years and I didn’t have the heart to finish it on one project!

Foam Crafts 3
Faux tile Technique
So used a different Faux tile technique!Scored the image every inch , sponged it all over with Versamark watermark ink , poured clear sparkle embossing powder on it and heat embossed to get this beautiful sparkling and texturedtiled image!
If you are new to  Heat Embossing  [like me!] , here are a few other ways to have fun with embossing
And my favorite Embossing powder which you may have guessed is the WOW Clear Sparkle!
Foam Crafts 4
Foam Bow
Made a background by layering Spellbinders Borders and adding my favorite Cheery Lynn  butterfly and a glittery foam bow.
This was one of the rare times my husband noticed my card and said it looked beautiful ! But my usual supporter in crafting, my 8 year old daughter said " Its Okay" !!
So I dont know...I think I have to leave it to my blogger friends to tell me how it is!

Supplies : Dies : Lifestyle crafts Bow,Spellbinders Borderabilities Curved Borders 2 ,Cheery Lynn  Butterfly,Spellbinders Shapeabilities Lace Hearts.Embossing : Versamark Watermark ,WOW Clear Sparkle Embossing Powders
Linking to : Imaginations Sep[Embossing] ,WOW Embossing  Sep [favourite is WOW clear sparkle powder], Emerald Fairies Sep[Springtime], Cheery Lynn  150 [things with wings],Alphabet Challenge  Sep 24[P for petals], Moving along with the times Sep 17 [ texture],Crafts Galore encore Challenge 9 Sep[make a card],Sparkles Monthly Challenge 60oct 15 [ things with wings] ,Emerald Fairies Sep[ springtime],Butterfly Challenge 14  Sep 23[Ugly Bug Ball],Natalie and Amy Sep [ things with Wings],QKR stampede blog  Sep 18[ tings with wings]

Edited : In blogland we make such  good friends that when a friend wins ,we ourselves feel such joy for them. I experienced this phenomenon recently when my dear friend Lisa became a finalist in the Spellbinders Gilded Contest .
Lisa is not only super talented-- she is a fantastic blogger friend who will support you fantastically no matter what kind of crazy project you make [ Thank you so much Lisa !!]
It would be awesome if you could vote for her
PS: she is also giving away a fab prize! : Lisa's Blog

Woodgrain Tutorial by Rupa

$
0
0
Woodgrain tutorial
Altered Shoe Box
            Dear friends this is a super exciting post ....most of you know my love for recycling ---not only do I enjoy to do recycling crafts,I get super excited when I see other crafters do it! I have featured 2 other talented Recycling Crafters in the past [see Guest Posts on this blog by Khadija and Katy] and today I am thrilled to have the super talented Rupa [of Tofa- Together for Arts]as my Guest. Rupa is an artist + crafter [a deadly combination!!] and she is here to share with you how she made the gorgeous  Faux wood texture on the shoe-box she recycled!
Over to Rupa....
Rupa
Rupa
Hello Crafters,
I am Rupa from Bangalore(India).I feel so honored and excited to be a guest today in Sonia’s blog. We live in the same city and share the same passion for “ Re cycling”! Most of my projects have an up cycled item and they are all altered projects.
I was so overwhelmed by the great response to  my “Creaking Door” and the icing was when Sonia asked me to do a tutorial on how to create the wood grain texture or the “faux wooden log”. It gives me great pleasure to share the technique with you all. Thank you Sonia, for this opportunity to connect with your bloggy pals.
It’s quite simple and the materials required are just a handful!
So, here we go…
Materials required:

  • A piece of corrugated cardboard
  • Acrylic spray paint-black
  • Acrylic tube paints- in brown, black and white
  • Big flat brush and a couple of thin round brushes
  • A cup of water
  • Rag cloth

Woodgrain tutorial 1
Woodgrain Tutorial
Procedure:
Step 1- Spray black acrylic paint on the cardboard randomly leaving a few brown patches. It can be just one layer of paint and need not be too dark.
Woodgrain tutorial 2
Woodgrain Tutorial
Step 2- The grains are created using the dry brush technique, so keep them dry! Squeeze some black, brown and white paint on to your palette. Using the big flat brush, dip the bristles onto white paint and tap excess. Load the paint only at the tip and now give a couple of strokes on the surface till the paint fades.
Woodgrain tutorial 3
Woodgrain Tutorial
You will notice a natural rough texture because of the dry technique.
Woodgrain tutorial 4
Woodgrain Tutorial
Step 3- Clean the brush and dry completely. Load black paint at the tips and do the same as step2, overlapping on the white strokes.
Woodgrain tutorial 5
Woodgrain Tutorial
Step 4- Now load brown paint and do just few strokes here and there. Wait for the surface to dry. See the layers build up!
Woodgrain tutorial 6
Woodgrain Tutorial
Step 5- To create the knot holes on the log- load white paint in one corner of the flat brush and rotate clock wise at one spot. 
Woodgrain tutorial 7
Woodgrain Tutorial
 Follow with a touch of black too.
Woodgrain tutorial 9
Woodgrain Tutorial
Step 6-Now take the thin round brush and load black paint and draw lines on the card board at regular intervals of say 1.5 inches. Once that dries, dry brush white paint on both sides of the black line so that the black “pops up”! This will create the illusion of space between the logs!
Woodgrain tutorial 8
Woodgrain Tutorial
At any point you can go back to step 2 and continue if you are not happy with the look. It is quite forgiving that way.
Your wooden plank is ready for the project.
Look at what I did to it!I painted the lid of a shoe box to create a door and embellished it too.
Woodgrain
Have a look at this project "The Creaky Door" and do let me know if this tutorial was helpful.
Altered Shoe Box
Hope to see a lot of “Loggy” creations from you all. Do drop a comment on my blog if you have any other queries.
Until then,
Happy Crafting and Recycling.
Hugs,
Rupa

Wasn't that just AMAZING...!!!!....And that was just a teaser about Rupa's talent.
Please do drop by her blog  Tofa- Together for Arts  to see more of her work and I assure you , you wont be disappointed!
And if you are in Bangalore-- you can actually learn lots of tips and tricks from Rupa in person as she regularly conducts some amazing craft workshops.

Foam Flowers Photoframe

$
0
0
Handmade photoframe
Foam Flowers
            Dear friends Thank you so much for the fantastically warm response you gave to my friend Rupa's Wood grain tutorial ---that is what I like best about blogland- the way we support and encourage each other!
          Sorry I have not been around to visit....I had an extremely busy week last week with a huge patient load and my usually good time management skills went for a big toss.I feel so bad for letting down the Tuesday Throwdown team as I couldnt make my Guest DT project for them this week.
           Sharing a simple Photoframe my daughter and I had made as a Teacher's Day gift. Altered a desktop calendar like in the earlier DIY Photoframes I had shared and this time added foam flowers.
handmade foam flowers
Foam flowers
Made the foam flowers using a favorite Cheery Lynn  Sunflower die using this tutorial : Easy Daisy tutorial . I love using foam to craft as it doesn't crush and this was a special advantage in this photoframe as I didn't have to worry about the flowers getting crushed while the handmade photoframe traveled to school!
handmade foam flowers
Handmade Photoframe
We used chunky glitter on the center of the purple flowers and added Heartfelt creations stamped and die cut leaves. This was a super simple Photoframe churned up in minutes!
You can see similar foam flowers here: Fairyland Diorama tutorial 

Supplies : Dies : Cheery Lynn  Sunflower, Cheery Lynn  Butterfly, Heartfelt creations Leaf, Marianne Fence
Linking to Cheery Lynn  Challenge [die cut flowers], Divas by design  sep 23[ anything but a card]

Paper Lantern / Gazebo Tutorial

$
0
0
       
Paper Gazebo
              Dear friends I have been fascinated by Gazebos for a long time and wanted to make a 3 D Paper Gazebo .The Paper Gazebos I saw online were all made using SVG files and since I dont have an electronic cutting machine ,improvised and made one using die cuts and paper rolls.
Paper Gazebo
At Tuesday Throwdown the theme is to use opposite colors in the color wheel and so I made my Guest DT 3 D paper Gazebo in red- green!
My 3 D Gazebo is big enough to house a little doll.It can also be called a Bird house or  Lantern as it houses a battery operated tea light.
How to make a 3 D Paper Lantern/Gazebo
Making any 3 D structure in paper looks deadly complicated but its completely do-able if you break it down into parts!
And though I used die cuts to make the roof of my 3 D Gazebo, you can make one without using any fancy equipment!
To make it easier, I will break down the Paper Gazebo tutorial into 3 parts
  • How to make the Dome of the Gazebo
  • How to make the Supporting walls/Pillars
  • How to make the base of the Gazebo
How to make the Dome of the Gazebo
Paper Lantern tutorial 
You can make the roof of your Gazebo anyway you fancy! Here are some options:-

  • Conical  Dome:The easiest way to make the dome of the Gazebo would be to cut a thick card into a circle and glue it in a dome shape- you could decorate the rim of the cone with lace and pearls and it would look spectacular!
  • Pyramid Shape: If you like Pyramid shape [ I do!!] you can follow these tutorials  to make a pyramid and use it as your Gazebo roof: Pyramid Decoration tutorial , Pyramid tutorial 
  • Hemispherical Dome: If you want a simple style Gazebo just use 2 circles and make a dome  like I did to make a 3 D pram shaped box using this Pram Box tutorial 
  • Slanting Roof: You can adapt the roof I made for this Wishing Well to make a Gazebo roof too!
  • Fancy Domed Roof: If you really wanted a challenge ,you could make a real fancy 3 D domed roof using a printable like I did in the Taj Mahal Model
  • Using Die Cuts /Hand cut shapes
I used the same Marianne Petra Corner die set I used to make the 3 D Chariot.
Paper Lantern tutorial 
You don't really have to use the same dies I used-- just try playing with whatever die cut shape you have on hand or hand cut a shape you fancy.
3 D Gazebo tutorial 
The picture above shows how the die cut looked before I inked it and heat embossed it with WOW clear sparkle embossing powder as described in the 3 D Chariot making post.
Gazebo tutorial 
I cut and heat embossed 6 of the above die cuts.Scored and folded them in half as shown below. As I said don't despair if you don't have the exact die I have shown-- you can make a gazebo dome using a humble circle shape too and use it as a base to make the rest of your Gazebo! [See tutorial to make a 3 D structure using Circles : Easy Paper decoration tutorial ]
Gazebo tutorial 
Apply glue to half of one folded die cut shape and stick to half of another one as shown below
Gazebo tutorial 
Stick  all 6 pieces and your dome is nearly done.You get a fairly lovely shape even if you use only 5 die cuts but I found working with 6  made the rest of the 3 D construction easier [ like placing the pillars] !
Gazebo tutorial 
Before you stick the last 2 pieces, add a hook if you plan to hang your lantern. I used a long jewelry finding and threaded a large bead on one end and made a hook on the other end.Later on I added a dangling heart to the hook on the inside and a pearl- ruby to the hook on the top.
Gazebo tutorial 
To complete the Gazebo roof, I used the Marianne die cut shown below which was again a bit plain on simply die cutting it but on embossing with Spellbinders embossing pads revealed beautiful embossed designs!
Lantern tutorial 

Attached 6 of the above die-cuts between the arms of the basic frame made earlier to make it more sturdy.Here is the aerial view of the Gazebo roof showing the pretty dies and bows.
Paper Gazebo tutorial 

Here you can see the dangling heart and pearly beaded sprays [See Easy Beaded Spray tutorial ] hanging from the center of the Gazebo roof.
Paper Lantern tutorial 

How to make the Base of the Gazebo/Lantern
Make the base of your Lantern / Gazebo to match the shape of your roof. The easiest shapes are simple squares and circles.
I  cut a circle from ivory card to form the base of my Paper Lantern and placed a battery operated tea-light on it and surrounded it with embossed die- cuts made by folding the 3rd design of die cuts from the same Marianne Petra Corner die set
Paper Lantern tutorial 
Here is how the tea- light looks when it is lighted up.
Paper Lantern tutorial 
You can stick the circle of card on a thick cardboard or even a CD.To make the base even sturdier, after adding the pillars ,wrap a  piece of corrugated paper around the pillars along the circumference of your circular base. 
Paper Lantern Base
How to make the Supports/Pillars of the Paper Lantern/Gazebo
You could use strips of card folded at right angles to make the supports but I found it easiest to use rolls of corrugated paper as pillars.
Paper Lantern tutorial 
Corrugated paper is super easy to fashion into rolls. I used 1 inch width corrugated card , cut 6 pieces into lengths I wanted and rolled them up tight to form pillars.Stick the pillars on the circular base and on to the roof of  the Gazebo.
Paper Lantern tutorial 

Tip to make 3 D Paper-crafts : Obsessing a bit about symmetry, gluing and re-gluing is the key to building a good looking and sturdy Paper Lantern/Gazebo! Working with 6 eg :6 spokes on the roof, 6 pillars, 6 sides  etc makes it easier to build a symmetrical 3 D structure than working with 5 !

Paper Gazebo
The delicate lacey bows I used on my Gazebo are Sue Wilson dies from Crafters Corner.
Paper Gazebo
I do hope you enjoyed my first DIY Lantern ,and hoping some of the principles shared will come in useful to help you make your own Diwali /Christmas Lantern for the upcoming festive season.

Supplies:Embossing: WOW Embossing Powder Clear Sparkle, Versamark Watermark Stamp pad, Ranger Heat gun;Dies :From Crafters CornerMarianne creatable Petra Corners ,Tattered Lace Lacy RoseSue Wilson Filigree BowLifestyle crafts Circle DieSpellbinders Lace hearts;Embellishments: Crystal Beaded pollen from Crafters Corner;Lace : Commercial street Bangalore

Linking to: Marianne designs Kreadivas[Have used 3 Marianne design dies from the Marianne Petra Corner Die set],Imaginations[ Used both dry and heat embossing],Bunny Zoe's Crafts Sep [Lace],Hobbybook Designer[ embossing],WOW Embossing Challenge [Favourite is clear sparkle embossing powder and making 3 D projects],DL Art Sep linky,

Clay Bunny and Girl

$
0
0
Clay Bunny
           Dear friends super excited to share  some clay models made my by little daughter[ she is not so little any more-- she is 8 now!].Like many doting mums I do buy expensive toys for my little girl but despite me and her grandmother spoiling my little girl with expensive Barbie dolls, I am proud to say my daughter has the most fun while crafting with her hands!!
Clay Bunny
My daughter has holidays now and today my husband acted as babysitter! I was so thrilled to be greeted by this cute clay bunny on clay grass when I cam home from my Clinic today!
Clay Girl
Her father gave her an old tile to put her clay models on and she was so excited we loved her clay bunny she made a Clay doll to keep her bunny company!
Clay Models
The white and pink are some new clay colors I got for her, so like any little/big girl who wants to play with new crafty goodies you see a dominance of pink and white!! Ha Ha
Clay Craft Artist!
And here is my darling Clay artist with her clay models! Do pen down a few sweet words for my kiddo....believe me she is going to want to read all the comments and ask me what each one of you had said!!

Diwali Lantern

$
0
0
Diwali decoration
Diwali lantern 
          For my non Indian friends lemme explain the heading "Diwali Lantern" ...being a multicultural country we have many many festivals in India and Diwali is a widely celebrated Hindu festival and its also called the festival of lights ---it celebrates the victory of "light over darkness" or "good or evil"! We light oil lamps, lanterns and have a blast with firecrackers! This year I thought I would make a Paper Diwali Lantern .
          If you have missed my Christmas themed 3 D paper lantern tutorial do have a look at it to understand how I used 3 die cuts  from the Marianne Petra Corner die set to make the framework of my Paper Lantern
Paper Lantern tutorial 
        I love lattices and decided to dress up my basic lantern  by adding lattice die cuts between the pillars of the  Paper lantern.
Diwali Craft
Diwali lantern 
         The Paper Lantern houses a battery operated tea light and like every crafter who has laid hands on one of these...I just love how the light shimmers!

Diwali Craft
Diwali Crafts
My lattice die cuts [Wild rose studio floral frame die] fit snugly between the pillars of the lantern

Diwali Craft
Diwali Decorations 
At first kept it simple with just lacy red bows and  rhinestones.
Diwali Craft
Diwali Craft 
Red and white is a favorite color combination of mine and I think I can use this lantern for Christmas too [ Yes we celebrate Christmas too at my home !!] The photo below shows the bows alternating with the glittery embossed Marianne die cuts in the roof of the paper Lantern.

Diwali Craft
Diwali lantern 
I hinged one of the lattice windows instead of sticking it so that it can swing open .
Diwali Craft
Diwali lantern 
You can take out the tea light and switch it on when you want to light up the festive Lantern!
Diwali lantern
Diwali lantern 
           My daughter and I debated whether to add the red beaded garland or not...simplicity versus grandeur...and well since it was a festival project...the more decked up the better...right? I hope you agree!!
Diwali Decorations
Diwali Decorations 
Do tell me how you liked this festive lantern!

Supplies:Embossing: WOW Embossing Powder Clear Sparkle, Versamark Watermark Stamp pad, Ranger Heat gun;Dies : Marianne creatable Petra Corners ,Tattered Lace Lacy RoseSue Wilson Filigree Bow- all from Crafters Corner ;Lifestyle crafts Circle DieSpellbinders Lace hearts,Wild Rose studio floral frame [won from the wild rose studio blog];

Glass Cabochon Tutorial

$
0
0
Castle shaped box
Castle Shadowbox
             Dear friends sharing a Castle shaped shadow box  which I made for my DT project with Crafters Corner using a kit manufactured by LaLaLand Crafts. I had a lot of fun altering the MDF/chipboard pieces with distress inks, pearly  mists and clear sparkle embossing but my favorite element in the castle is the glass cabochons!
Shadow box
Glass Cabochon
I laid my hands on the gorgeous  glass domes called cabochons only recently and have fallen in love with them! They are economic, super cute and super easy to transform into embellishments and jewelry!
Glass Cabochon Tutorial
Glass Cabochon
         I wasn't really sure how to use them and when I Googled, I landed up on several you-tube videos.I am more of a pictorial person than a video lover so thought I would share the simple steps to make the glass cabochons if you are like me, and love to run through a pictorial in seconds than spend so much more time watching a You-tube video!
Glass Cabochon Tutorial
Glass Cabochon Tutorial 
Glass Cabochons are available in several cute shapes and sizes like ovals and rounds

Glass Cabochon Tutorial
Glass Cabochon Tutorial 
Choose a pretty pattern paper /glitter paper/ fabric or even a special  photo to use with your cabochon. If you have a punch the size of your cabochon...makes your life even easier-- but it doesnt really matter!

Glass Cabochons
Glass Cabochon Tutorial 
Place your cabochon on the design you want and trace loosely around with your pencil - you don't have to be super accurate as the convex edges of your cabochon will hide all little jagged edges and minor mistakes!!

Glass Cabochon Tutorial
Glass Cabochon Tutorial 
If you have a punch that fits your Cabochon size like I did- punch from the under-surface as shown above so that you can  see exactly where you are punching.

Glass Cabochon Tutorial
Glass Cabochon Tutorial 
Apply a clear drying glue like Modpodge [can also use our good old fevicol mr ]on the flat under-surface of your glass cabochon with a paintbrush/ foam etc.

Glass Cabochon Tutorial
Glass Cabochon Tutorial 
Place your paper cut on it and blot with a tissue/ cloth and leave to dry.
Glass Cabochon Tutorial
Glass Cabochon
Dont you love the lovely transformation of that bit of paper! The sparkling gem studded  dome atop is a broken earring I recycled and  the diamond chain was snipped off and old dress! 
Glass Cabochon
               My Castle Shadow box holds a royal Christmas scene with a glittery foam reindeer and a chipboard Christmas tree decked in rhinestones and a diamond chain [snipped off the old dress!] Added a metal filigree Glass Cabochon pendant on the Castle Banner to step up the grandeur!
DIY Pendant
Glass Cabochon Pendant
Most of the glass cabochons have matching metal case pendants to make jewelry like earrings and pendant but paper crafting being my first love I used my handmade pendant on my shadowbox! The gemstone stop my pendant is recycled from an old earring!
Glass Cabochon Tutorial
Glass Cabochon
Lots of ideas to use the Glass Cabochons --you can adhere a bit of felt to the back and use it on dresses or adhere it to a magnet and use it as a cute fridge magnet!
Castle shadow box
Castle Shadowbox
More about my Castle...here you can see the shimmer of the castle and the little bricks I made using clay which  I rolled out,cut up and inked with distress ink!
Tattered lace rose
Castle Shadowbox
Used the tattered lace rose die to make 3 dimensional flowers with crystal beaded pollen centers and the also used the same die to make a stand for the Christmas tree .
Glass cabochon
Castle Shadowbox
My little girl felt the reindeer and Christmas tree did not match the castle ...but somehow Christmas is on my mind and I couldnt bring myself to remove them!!
Castle Shadowbox
Castle Shadowbox
Added a royal scepter charm atop a "crackled" castle turret!
Castle shadowbox
Castle Shadowbox
And here is the Glittery Royal Castle all ready for a Pink Christmas! I hope you enjoyed the simple tutorial photos and liked my Christmas Castle! Do tell me how it is

For details on how I altered the Shadowbox kit do drop by  my Crafters Corner DT post on 12 ideas to Alter Chipboard/MDF 

Supplies :from Crafter's Corner,La La Land Castle Shadowbox ;Dies Tattered Lace Lacy RoseSue Wilson Filigree Bow,Sue Wilson Faux quilled Leaves , Memory Box Rounded fenceSpellbinders Lace hearts:EmbellishmentsCrystal beaded Pollen , Charms , Cabochons and Pendants 

Linking to Countryview Challenge oct [sparkle and shine] ,CHNC Oct Challenge 

Altered Bottle with Mseal

$
0
0

Altered Bottle
          There is something so exciting about recycling crafts....if you are a recycling/ altered project enthusiast like me I am sure you agree it is so thrilling to see the transformation ! So when it was my turn to choose a swap theme for our small group of "Bangalore Papercrafters" I chose the theme altered bottle. There are so many beautiful wine bottles out there but my hubby is a teetotaler and I had to settle on altering a Dettol bottle [ yeah we have plenty of those being doctors and all!!]
Altered Bottle
After the usual scrub and label stripping , the Dettol bottle got painted with Gesso and white acrylic paint and sponged light green with Mowed lawn distress ink
Altered Bottle
Mounted a  3 D decoupage fairy image with nearly 5 layers  atop a lacey heart on one side of the bottle .[Here are more examples of similar fairy 3 D decoupage : Spinning card tutorial  and Altered Tin can]. Added a spray of pearls to splay over the little fairies!

3 D decoupage
          The other side of the bottle has a floral image which at first sight looks like paper/ napkin decoupage...well its neither! The image is a beautiful tattoo I had picked up from a local super market and experimented on the bottle using water to transfer the image! Haha yes it worked much to my surprise!! Anyway gave it a top coat of modpodge so that it doesn't flake off!

Thai clay rose
I experimented with Thai clay [an expensive air dry clay]for the first time and made the red roses. Working with Thai clay  was a bit of a struggle as it would dry out so fast; so used the much cheaper Mseal to make all the leaves [Click this link to read about Mseal and how to use it :  Mseal Art tutorial ]
Mseal Art
Mixed green oil colour in while kneading the 2 components of the Mseal and hence could achieve a better look than my rose leaves in Mseal Roses Art.
         
clay rose
Thai clay rose
The lacey white bow was made with a Sue Wilson die [ a gift from Shalini of Crafters Corner] and those pearly leaves are a find from a local fancy store!
Paper Bow
Here are the Mseal clay leaves winding over the edge of my altered bottle! The best thing about Mseal is you dont have to use an additional glue to stick it ! If you work while the Mseal is soft and pliable it will stick easily to glass/ wood/ metal!!
Mseal Art
The Dettol bottle had a rather sorry looking cap and I sculpted a more glamorous faux cap using Mseal and gave it a skirt of dangling crystal beads! Not too happy about the faux cap painting though!
Mseal art
Here is my altered bottle sitting in our showcase and the mirrors reflecting the other side too!
Altered Bottle
My bottle went to the multi-talented Anuja...hope she likes it !
Supplies : 3 D decoupage sheet :from Dufex, Crafters Companion company, Dies :Sue Wilson Filigree bow die from Crafters Corner ;Spellbinders Lacey Hearts, Mseal : local stationary Shop; Thai Clay : from Itsy Bitsy; Distress Ink : Mowed Lawn and Victorian Velvet

I hope you like my altered bottle...do tell me how it is....

Linking to Outlawz Twisted Thursday [ fav techniques are clay crafts + recycling crafts + die cutting and 3 D decopage!!],TTCRD 21-27 ,

A Musical Box Card

$
0
0
Exploding Musical Box Card
Hi friends sharing my DT project for Crafters Corner- a  special exploding box card featuring a rotating piano and real music playing .


Do click on this short video to see the little piano rotating and the music playing while it does!
Piano Card
Here is my piano dressed up in glitter and a handmade red foam rose! I made all the red foam roses in this project using a Spellbinders Baubble Blossom 1 die but you can also make foam flowers by hand cutting  foam : Foam rose tutorial 1 and Foam rose tutorial 2 ]
Foam roses
On one panel of the exploding box, stamped "Love" and added a book style charm which opens to reveal a script inside!
Foam roses
This panel has a stamped bird silhouette+ musical notes, a bird charm ,fussy cut bird cage, a memory box die fence and more foam roses.
Handmade roses
Clock stamps are such useful stuff to have in a crafters armament and here I used it to depict " Timeless Love" And I think I am losing count of how many birds are in this project. The bird cage charm is a personal favorite!
Bird Charm
Another singing bird charm and a  silver "Key to my Heart" [ cut with Spellbinders Lacey heart die]

Exploding Box Card

I hope you liked my first exploding box card. To see how you can make a musical box card of your own , check out my DT project at Crafters Corner: How to make a Musical Box card

Supplies : Darice Piano from Crafters Corner, Charms from Crafters corner,Dies:   Sue Wilson Filigree BowSpellbinders Lace hearts [ the key],Spellbinders Baubble Blossoms 1, Memory Box Rounded fence

Linking to  We do doobadoo 18[ Have used dies as such + transformed the Spellbinders baubble die into the red roses], Imaginations Challenge 5DL art Nov linkyScribble n scrap,  Crafty Catz Weekly 153, Sister Act Card 81, 613 Avenue 95 Anything goes +- Boxes, Party time tuesday 187, Crafters Cafe  88[ things with wings] ,Moo Mania metal ,Pennys Challenge 201, Simons says wed, Art by Miran 18 , Kraftin Kimmie [glitter and glamour], Divas by design , Card and scrap, Aud Senitments 2 or 3 word sentiment [ mine is the "I love you" on the metal charm], As you like it [I chose the elegant style as I wanted to showcase the mini piano and in my mind music and a grand piano plus red roses spells elegance!!], 4 crafty chicks , Crafty Hazelnuts Pattern paper Nov, Crafty Boots Music, Stampotique designs SDC 171 favorite colors [ My fav color combination is red, black and white], TTCRD oct 27 - nov 3, Word art wednesday 156, My craft creations, My time to craft[ charmed], Cards Galore Encore

10 Blogger Tricks to a Better Blog!

$
0
0
Blogging Tips
             I know we crafters would rather spend time crafting than bother about the technical aspects of blogging; but I am sure there is not a single blogger out there who doesn’t love their blogs and wouldn’t like to spruce it up a bit.I have been blogging since 2010 and have read up, as well as experimented quite a bit about the technical side of blogging.
I have earlier shared 2 posts about Blogging
  • Easy tips for bloggers– covers Basic blogger tips so read it first if you are a new blogger or if you haven’t read that post before.
  • Photo tips for bloggers- Important for us crafters since we post a lot of photos on our blogs
WARNING : I must warn you beforehand that at the end of this post you may feel rather overwhelmed-- please don't-- these are tips and tricks I garnered over years and in the end its your blog-- go with what you love!!
So ---Sharing a few easy and not so easy tricks to spruce up your blog

1. Add your signature

You may have noticed that many bloggers have a stylish signature beneath every blog-post. Not only does a signature add a lovely touch to your blog-post but it helps a new visitor address you by name easily. You don’t actually have to manually do this every time you post a blog and it’s a one of the easy blogger tricks out there!

Visit this link to know how to add your signature below every blog-post:My Live Signature
PS: It doesn't work if you are posting using Windows Live Write and that is why some of my  own posts dont have it[more about that later!]

2. Add links to old posts

This is one of the coolest and easiest ways to entice your visitors to explore more of your projects and breathe life into older posts.
  • Manual– Whenever you write a new blog-post try to incorporate links to older posts whenever you can. E.g. If you are sharing a stamped card, share the link to another card you had made earlier using the same stamp/technique etc. Or simply thank your readers for comments on your last post. Yes it may mean adding an extra minute to your Blogpost writing time but do it whenever you can and make it a habit!
  • Linkwithin– If you are not familiar with it –it’s a cool widget which shows 3- 4 thumbnails of related projects beneath every blog-post on your blog.
    Blogging tips
    Most times related posts with same label are displayed – just add relevant “labels” to your blog posts and “Linkwithin” will do all the hard work for you!! Here is the link :Linkwithin
  • Nrelate- this is an alternative to Linkwithin. My friend Tanvi had some problems with Linkwithin so she used “Nrelate” – which does the same function but looks a bit more stylish in my opinion. Opt for whichever you like better.

3. Make use of Archives and Labels

Many a times when you land on a blog and like a particular post , you like to see the earlier works of the blogger and if there is no archives widget ,there is a high chance you may lose interest just clicking the “older posts” . And I find this especially useful in Challenge blogs  as its easy to locate the new challenge posts, winners post etc
Blogging tips


The Labels widget is another must have on your blog.See this Basic blogging tips post on importance of labels. In fact your labels widget is something which can be customized and added several times on your sidebar! Eg. I have 2 types of labels widgets- one displays a wide variety of crafts with the number of posts and another categorizes my posts according to the craft material used eg Foam, Clay etc !
Blogging tips

4. Blog Background

I have done a lot of reading up on this one!!
  • Background Color: Black may be your favorite color but in choosing a background for your blog, always choose a background with a light color as it’s easier to read and more pleasing to the eye. And not only that since we crafters share a lot of photos , neutral background colors such as white and cream wont clash with the  project's colors . It’s not a coincidence that the big websites out there have a white background!
  • Blogger Templates: There are lots of free blogger templates which can help stylize your blogs easily with a few clicks but exercise caution on what you add to your blog as some of the html codes in the free blogger templates may have errors; and graphics on some blog designs can drastically affect your blog load time so choose from sites which are already popular in blog land
  • Always be careful what html code you publish to your blog.
  • Always backup your blog template before you make any changes so that if anything goes wrong or you find you don’t like it you can always revert back easily!
    Blogging tips-template backup
    Here is how you can back up your blog template : Go to blog dashboard, click Template [ see double red arrows at the bottom left hand corner of my screen capture photo above] and click Backup /Restore [ see double red arrows at top left hand of my screen capture photo] and save to a safe location on your computer.

5. Blogpost Font

I have researched a lot on this one too and will share the most important points! Last year I found I tended to skip reading blogs with script style font and that lead me to discover age had caught up with my eyesight and I needed glasses! Well, there are zillions of readers out there with suboptimal eyesight and tweaking your blog just a little bit will be so helpful to them!
blogging tips
Blogging tips- fonts

  • Choose a font based on readability rather than beauty! You may be attracted to stylish script style fonts such as “Monotype Corsiva” but these are so much more difficult to read than “Arial” or “Verdana”.
  • Size of the fonts – Your readers eyesight may not be as good as yours and they will not really bother to peer too long and try to read if your website is in a small font size!
If you want to read more about  fonts check out : Best font for your website
Experts recommend : Font size 14 -16 pixels and fonts Arial, Trebuchet, Verdana, Impact, Ms Sans Serif, Lucida Sans unicode, Tahoma or Comic Sans
And if you are wondering which font I have on this blog its Arial.

6. Blog layout

  • Blogger Sidebar: Blogger gives you an option of 2 sidebars. Opting for one sidebar makes your blog less cluttered and your readers don’t have to keep scrolling all over to read your blog! Here is how to tweak your blog layout 
    Add caption
    On dashboard click layout [double red arrows near bottom] and click template designer [double red arrows near top].
    Blogging tips
     In template designer click layout and chose the body layout you want to try !
  • Follow Widget: Many a times I have had to scroll all over a blog to find the all important “Follow” widget. I have written about this earlier too but since it’s so important and a mistake I see made all over blog-land stressing on it again. Place your “follow me” widget at the top of your sidebar or at the top of your blog.
    Follow me widget
  • Some time back Google restricted Google Friend Connect to only blogger blogs [and GFC does act crazy at times by not allowing people to follow a blog] so its prudent to have other options like Bloglovin, email subscription, or other options on your blog to allow readers to follow your blog. Place all the “following” options you want at easy to see positions on your blog.

7. Use your sidebar wisely

Your sidebar is an important part of your blog. Use it wisely and effectively! People are willing to pay for advertising space on your sidebar [I know since I have had lots of offers!] so even if you don’t sell it to advertisers, use it optimally for your own benefit!
  • Place what is most important to you right at the top of your sidebar. If you have a shop, place your shop logo and link it or add enticing pictures of your new products/handmade crafts etc! If you take craft classes, advertise that! I could go on and on but I think you get the picture!!
  • Be very cautious in adding 3rd party widgets! – When you install a 3rd party widget you add extra html coding to your blog and can leave your blog potentially open to hackers! So think twice- do you really need to have that ticking clock or cute animated kitty on your sidebar?

8. De-clutter your sidebar

  • Do you really need those awards and badges to hog your sidebar space? If you are very much attached to them for sentimental reasons—relegate them to a “page”
  • Track those giveaway photos and remove them as soon as they expire
  • Once you have accumulated numerous top 3 and winners’ badges, shift them to a “page” like I have done or if you still want to spotlight projects you are especially proud of, add the project photos instead of the badge photo with a link to the respective posts.
    Blogging tips

9. Creating Interactive Menus

You can see a couple of interactive drop down menus in my blog sidebar.
blogger tips
Blogger tips- drop down menu
And this is how it works : click the arrow and a menu pops out!


They look nice and are useful too, but I don’t update them much because frankly speaking it’s quite time consuming! If you have quite a bit of time on hand and feeling adventurous blog wise, here is tutorial link I followed to make the drop down widgets:How to make drop down menus

Warning: If you get even a single character wrong in the html script your code won’t work!

10. Creating Thumbnails

If you want to add thumbnails to your blog like in the handmade flowers tutorial page, here are 2 links
Blogging tips- Gallery
Warning: this involves multiple steps and is quite time consuming!
How to create thumbnails
How to create a thumbnail Gallery - by my blogger friend and well know crafter Lisa

I hope this compilation of tips is useful to you
I have plans for 2 more posts on Blogging tips - Blogging Etiquette and My Blogging Secrets - will work on it if this one proves popular- So do tell me if you like this one! 
I have to be certain I don't put my crafty friends to sleep or chase them away from my blog!!

Modes of Transport School Project

$
0
0
Paper Caravan 2
Cardboard Caravan
           Of late I have been a bit lazy posting kiddy crafts, but nearly everyday I get an email asking for guidance on one school project or the other ;so sharing a DIY Paper caravan we had made at home for my daughter's “modes of transport” school project .
Well she  could take a simple paper boat even as it was not a competition or anything; but those of you who have been following my blog know my daughter likes to make " extra special" school projects!  [Meaning extra work for her Amma!!]
Last year we had made a Hot air balloon and this time she wanted to make a Caravan!

Paper Caravan 1
DIY Paper Caravan
It was a purely recycling craft as we recycled an old cardboard box to form the basic framework , the wheels and the dome of our caravan. Here you can see the little crafter in action gluing pattern paper to the cardboard box.
Paper Caravan 3
Modes of transport school project
Our Caravan has cardboard wheels lined with pattern paper so that they could take the weight of the Caravan. The Glue gun couldn't stick the wheels very well so finally we used foam tape.Cut a larger circle into semicircles and stuck them to the top of the box to help form the dome of the caravan. I could have followed this Pramshaped box tutorial to help make the semicircle shape but this was a rush job so stuck the semicircles on double sided foam tape and used washi tape to secure  it!
Paper Caravan 4
Recycling Craft
Gently curved a piece of thin cardboard [ with pattern paper stuck over it] and stuck it to the semicircles and body of the caravan to form the dome of the caravan .I was not very neat with the glue gun but we could mask all the glue strings by covering with washi tape.
My Little girl was very particular that her caravan should have a  door which can swing open and closed! [He-he yes a little bit of "hinge paper mechanism" could achieve that!] 
Can you spy all the cute "heart" stones on our caravan?
 I know my paper crafter friends must have seen many super elegant paper caravans on the net but I hope you like my little girl's cheerful kiddy style one as well!

Supplies : Lifestyle crafts Circle dies, Shutters made with Provocraft die, Spellbinders woodgrain embossing folder, Washi tape from Priya of the Craft shop.in
Here are links to more School projects 

Handmade Photoframe

$
0
0
Handmade Photoframe
Handmade Photoframe
Dear friends ,Thank you so much for the encouraging words on my Tips for a Better Blog post ! I had put in a lot of work on that post and it feels nice that many of you found it useful. Sharing a simple handmade photoframe made by recycling a desktop calendar
Handmade Photoframe
Handmade Photoframe
The paper flowers with the pom pom centers are handmade and here is the link to the Paper Flower tutorial 
Handmade Photoframe
Handmade Photoframe
The butterfly was stamped and heat embossed and then water-colored.These Sizzix butterflies and the Cheery Lynn  butterflies are my favorite! You can see more of these butterflies in my fairy land diorama tutorial 
Handmade Photoframe
Sharing  something which is making me sad
Blogging and sharing crafty tutorials and interacting with my blog readers has always given me such joy in the past  but I am  rather saddened today as I found one of my photoframe tutorials published on a website with all my watermarks erased from the photos. This is the 5th time this sort of thing is happening...writing tutorials takes so much time and effort and it is so disheartening when people simply copy whole posts and post to their websites...so depressing !
Do guide....feeling rather miserable !
Update : I Contacted the admin of the offending website and they have now removed the copied article...that is some consolation!

Supplies : Dies : Spellbinders lace hearts,Spellbinders majestic labels 25, Memory Box rounded fence, Marianne bird, Sizzix Tim Holtz tattered florals, Heartfelt creations leaf,Sizzix butterfly , Cheery Lynn  butterfly, Cheery Lynn  fanciful flourish
Linking to We do doobadoo 18Cheery Lynn  Autumn

How to Decoupage Plastic with Mod Podge

$
0
0

Decoupaged Set

          Hi friends Thank you so much for the supportive comments about my blog tutorial post being copied.....it was such a  depressing incident but I think I have to jump right back into sharing and not let a handful of unsavory people affect me as there are so many wonderful people who drop in on my blog ,who take time to write encouraging comments and who mail me thanking me for the crafty tutorials.

This is a decoupaged Stationary Set with handmade roses

Plastic Decoupage
           My regular readers know that I love to make my own flowers and believe me roses are the toughest handmade flowers to make! Recently I  experimented at simplifying rose flower making and could make these paper roses!
Handmade roses
             If you like these handmade roses as much as I do ...I will be happy to share a rose tutorial ! But for now a few tips on how to decoupage plastic material.
            If you are familiar with decoupage techniques you will know plastic is the most difficult surface to "mod podge" as it is so smooth and slippery ! If you want to know about Mod podge and all the little tricks and secrets on how to use it to decoupage read this post : Mod Podge Tips
decoupage plastic
Decoupage on plastic
          This was the plastic pen-stand I altered by decoupaging. 

Materials Required to Mod Podge Plastic 

  1. Decoupage glue : Mod Podge Matte- I prefer Mod podge to watered down Fevicol[PVA glue] as it has the perfect consistency and stickiness property!
  2. Tissue paper or Pattern Paper 
  3. Foam Brush or a plain brush - read more about brushes for  decoupage here : Mod Podge Tips
  4. Lots of Patience!
If you are a beginner at decoupaging the best starter project is a wooden object and MDF is the ideal material to Mod Podge! Attempt plastic only after you have got a hang of decoupaging techniques.The reason why plastic is difficult to decoupage is because its surface is non porous and your paper can keep sliding off! 

Tricks to Decoupage Plastic

  • Sandpaper it : To help decoupage an extremely smooth plastic surface  you can actually sand it with sandpaper to roughen it up a bit.I didn't have to do it in this project as my pen-stand was not too smooth .
plastic decoupage
How to decoupage plastic
  • Mod podge smaller bits at a time to avoid wrinkly decoupaged surfaces! Here I have cut my decoupage paper to size to line the inner and outer surfaces of the plastic pen-stand.Mod Podge curves by using small bits of paper
    Modpodge tips
    Decoupage tutorial 
  • Be very very patient - give enough time for your paper to stick to the base-coat of Mod podge before applying your top coat or your paper will just lift up and make you frustrated!
 Decoupaged Pen-stand
 A little bit of my plastic does show through but I think it adds to the charm of the final decoupaged object in this case!
decoupage tutorial
Decoupage
This was how my paper holder looked before I altered it ...the saying was cool but I think I prefer roses to "ear-less tribal head" any day...what do you say?Oh forgot to tell you...I also made the pearl swirl leaf on my paper rose
Handmade Roses
For  more inspiration on Mod Podge be sure to visit my friend Khadija [ whom I have also featured on this blog in this Guest Post ] ...her whole website is a treasure trove of Mod Podge projects
Also do tell me how you like my altered Stationary set

Supplies : Mod Podge, Decoupage Paper [Itsy Bitsy], Dies : Spellbinders Rose creations, Heartfelt creations leaf, Marianne leaf. Stamps : Heatfelt creations leaf. Inks : Distress Ink peeled paint , worn lipstick, Ranger Archival Ink Coffee

Sospeso Transparente Bouquet Tutorial

$
0
0
Sospeso Transparente 
      Hi friends many of you may be already familiar with the  beautiful craft of Sospeso Transparente but if you are hearing about it for the first time...Sospeso Transparente is a 3D Volume Decoupage craft invented and patented by Italian artist Monica Allegro .It basically involves heating and shaping  flat designs into gorgeous 3 dimensional beauties!
Sospeso Transparente 
     These Sunflowers are my first attempt at Sospeso Transparente and I had so much fun arranging the them in all sorts of places in my house- the picture above is of our Passion fruit Vine adorned with Sospeso Transparente Sunflowers!
Glass Cabochon
I could make a matching "Sunflower" Glass Cabochon pendant for my flower basket using some DCWV paper. Click here for the Glass Cabochon tutorial
Sospeso Transparente
Sospeso Transparente is one of the most magical crafts I have come across...it is indeed sheer magic to be able to convert a printed film of Sospeso Transparente into a magnificent 3 dimensional object!
Sospeso Transparente Printed film
There are different techniques in Sospeso Transparente and the simplest is using printed films. I have shared a very detailed tutorial about the materials and techniques at my Sospeso Transparente tutorial post at Crafters Corner .But to simplify it there are actually just 3 steps involved in Sospeso Transparente with printed films : 
  1. Cut the design
  2. Heat the design
  3. Emboss
Sospeso Transparente tutorial 
           The flowers look gorgeous just as they are but you can go ahead and add fancy flower centers such as rhinestones, pearls, glitter balls etc. I had once used chunky glitter on Felt Sunflowers and loved the effect so this time too I used chunky glitter but gave a domed center to my Sospeso Transparente sunflowers
Sospeso Transparente 

How to make a domed Flower Center

Sharing a mini tutorial on how to make the domed center of the sunflower. You can use the technique not only on Sospeso Transparente flowers but also on felt, foam and paper flowers.
Sospeso Transparente 

Materials Required

  • Glitter , glitter balls or even tiny beads - to put on top of the dome
  • Clay -To make the dome lightweight air drying clay is preferable so that your flowers dont become heavy. You can use brands such as Amos, Super clay etc-- these clays are a bit sticky when you use them but dry lightweight and dont crack. Use clay in the color which will match the glitter you plan to use on top
  • Glue - your glue needs to be one which dries clear and is not too runny
Flower center tutorial 
  1. Make Clay domes : Roll clay into a ball and flatten it so that the base will be easy to stick to your flower center. I made several sized balls as  my sunflowers were all different sizes
    Flower center tutorial 
  2. Coat domes with glue :Put your clay dome on a plastic sheet/ lid  etc[ so that your flower center wont stick to it!] and generously pour or paint the dome with glue.
    Flower center tutorial 
  3. Pour glitter onto your clay dome: Get a good covering and shake off the excess after giving enough time to dry-- DONT BE Impatientand touch your flower center before its fully dry or you'll end up with sticky glitter all over your fingers! 
Sospeso Transparente 
Stick the centers to your flower : I stuck the glittery centers to my Sunflowers using regular white PVA glue but you can also use the glue gun but be careful as heat can alter the shape of your formed Sospeso Transparente flowers

How to make a floral bouquet

Again this mini tutorial is not just for Sospeso Transparente flowers but can be adapted to make a bouquet of felt, foam or paper flowers. 
Flower bouquet tutorial 
Materials required
  1. Clay -to make flower calyxes- you can use the soft types of children's clay in the market  [like Amos, Super clay etc]which dries lightweight without cracking or more expensive air drying clay or if you are from India Mseal like I have used here.
  2. Sticks, skewers, wires etc - to make stems
  3. Floral tape - to wrap around your stems
If you are using Mseal : Mix in a little green oil color into your mseal dough while you are mixing it [ like I did for my Altered Bottle art] .Also another important point while working with mseal is you have to work fast to take advantage of the sticky nature of the mseal.
Flower bouquet tutorial 
  • Pinch off some clay and shape it into a cone as shown in the pictorial
  • Insert a skewer/ wire into it. Mseal is sticky so you dont have to use glue. If you are using clay you can dip the end of your skewer in glue before inserting it into your clay
Flower bouquet tutorial 
  • Slightly flatten the top of your "clay calyx" 
  • Stick your clay calyx to the under-surface of your flower using glue. Again if you are using mseal ,you dont have to use any other adhesive if you stick it to your flower while the mseal is still soft and pliable [ once it dries and hardens it become non sticky]
Flower bouquet tutorial 
  • Allow the flower stems to dry
Flower bouquet tutorial 
  • Apply a bit of glue on your floral tape and wrap around your flower stem
  • Add leaves if you wish
Here is the link to another Handmade bouquet tutorial  variation with  the  flower calyx  made by quilling .
Sospeso Transparente 
I hope you enjoyed my mini tutorials to making the flower center and the flower bouquet . All the little pearl branches are handmade too [ will share how I made them soon!]
You can add Sospeso Transparente flowers to cards, scarpbook layouts[ big advantage is they dont squish!], home decor glassware, frames, jewelry, photoframes etc
I hope you liked my little "Bouquet of Sunshine" to warm your day this season! Do tell me how it is.

Supplies :All courtesy Shalini Mittal of Crafters Corner : All Sospeso Transparente Materials , Glass Cabochons,Matching Pendant and metal ball chain

Linking to Try it on Tuesday [ Handmade], Imaginations , DL art Nov linky

Easy Paper Rose Tutorial

$
0
0
easy flower tutorial
Paper Rose tutorial 
Hi friends Thank you so much for all the appreciation you showered on my Sospeso Transparente Bouquet tutorial ..I was thrilled to know I had introduced a new craft to many of my readers! Sharing a simple side step card with an embossed "Thank you"and handmade paper roses.
paper flower tutorial
Paper Rose tutorial
           Many of you liked the roses in the Decoupaged Stationary set and wanted me to share a tutorial so made another project with the same type of roses though they didn't turn out quite as beautiful even though both were made using the same technique -----well that's handmade isn't it...wows sometimes and is "so so" at other times!
paper rose tutorial
Paper Rose tutorial
         Roses are one of the most difficult paper flowers to make and I have shared a couple of tutorials earlier on how to make roses with Punches [see thumbnails at end of this post]. The peach pink roses and buds in this card and all the roses in the projects below were made with the Spellbinders Rose creations die.

Altered Tin can - with a 3 D decoupaged fairy and handmade roses
easy rose tutorial
Paper rose tutorial 
Decoupaged Pen Stand - check out the link for tips on how to decoupage on plastic.
rose flower tutorial
Rose Flower tutorial 
Handmade Photoframe - a DIY photoframe made by recycling a desktop calendar and adding lots of paper roses!
flower making tutorial
Handmade Rose tutorial 
"Hot glue" Embellishment tutorial  - this post also has a tutorial on how to make your own "Faux Porcelain" embellishments at home using hot glue!
flower making tutorial
Rose flower tutorial 

How to make Paper Roses

Gabriella Pollaco has a beautiful tutorial on how to make roses with the Spellbinders die....but I have struggled in making the conical center as well as shaping the petals of the paper rose as my hands are not as nimble as hers!!
Sharing a method I sort of invented and started using recently which makes "rose making" so much easier!

Materials for paper rose making

  1. Ear Buds
  2. Paper Flowers
  3. Ink Pads
  4. Glue
  • Ear buds [Q tips] -- yes you read that right!! In fact I got the idea for this rose after seeing these funny looking ear buds in a local supermarket as it looked just like a rosebud! If you don't get these you can fluff up a regular ear bud and try but if you see these funny shaped ones in your chemist shop or local supermarket...grab them with both hands!!
    rose making tutorial
    Rose flower tutorial 
  • Paper flowers- though I have used the Spellbinders rose creations die, you can use any die cut, punched or hand cut flower [here is a hand-cut flower tutorial]  which can wrap your ear bud within it! I used the 2nd and 3rd largest flowers from the die set as marked by the blue arrows.
Spellbinders tutorial
Spellbinders Rose Creations Die
  • Ink pads- optional- if you want to make 2 tones flowers or ink the edges of your flowers like I did here.You can paint your flowers too but using ink pads is easier and faster.
rose tutorial
Paper Rose tutorial 
  • Glue - I strongly recommend using a hot glue gun unless you  have tons of patience !

Steps to make your Paper Rose

I captured photos of all the steps in making the paper rose and since there were quite a few photos have made a video slideshow of the Paper rose tutorial - Its less than 2 mins so do have a look at it to see all the steps in detail but here are the key points.
  • To make a Rosebud you just need a single flower and a ear- bud! -- Yes  its that easy!
  • You can make a Rose using 2  small and 2 to 3 large flowers
paper rose tutorial
Add caption
  • Inking : This step is completely optional- you can skip it and dive into the rose making!
    • Ink the Ear Bud : Cut the Ear bud in half  and ink its top so that even if a little is visible in your completed flower its camouflaged nicely
    • Completely ink the inner flowers
    • Ink the edges of your outer flowers
paper rosebud tutorial
Paper Rose Tutorial 
Why this  rose making tutorial  so easy is you are using the ear-bud to make the center of your rosebud or rose ! Wrap the petals of your flower around the ear bud and glue as you go! Because the ear bud has a stick, holding the flower while hot gluing it is easy and less likely to give you burns from the hot glue!
I hope I have piqued your interest...so sit back and watch this short video tutorial which is less than 2 mins! [Please do watch in HD to see the written captions clearly]

paper rosebud tutorial
Paper Rose tutorial
You can add a calyx to your rose bud and wrap floral tape or green paper around the ear bud stem to make a floral bouquet for your cards or scrapbooks.
paper rosebud tutorial
Paper Rose Tutorial 
  • If you want a fuller rosebud ..make it with 2 small flowers.
  • If you want to make the rose.....insert the 2 flower- bud into the larger  flower and glue the petals around it!
easy flower tutorial
Paper Rose tutorial

  • You can add more flowers to your rose to make a fuller rose!
Paper roses tutorial
Paper Rose Tutorial 
Other options to use instead of ear buds : bead, cotton ball, Styrofoam/thermocol ball, scrunched up paper ball or clay ball in the center.
handmade roses tutorial
Paper Rose tutorial
I hope you enjoyed my easy rose making tutorial .Do tell me how it is.
Here are links to more tutorials to make your own Paper Roses using Punches.

Pear Petal Rose

Heart Punch Rose

Punchcraft Rose

5 petal Rose

Supplies: Dies : Spellbinders Rose creations die, Heartfelt creations Spellbinders Classic leaf, Spellbinders Shapeabilities Decorative labels 28,Poppy stamps swirly curl,Poppy stamps Meso background , Marianne Anja leaves, Cheery Lynn  butterfly. Embossing folder : Sizzix Thank you,Stamps :  Itsy Bitsy lace stamp, Heartfelt creations leaf
Linking my Side Step Thank you Card to  : Poppy Stamps Challenge 2 , Crafty Sentiments[ die cuts], Deep Ocean Shabby chic, Loves Rubber Stamps Thanks, Party time tuesday 191 , Shopping our stash 179 [Both the poppy stamps dies were won in their blog hop], TTCRD dec 1, Dream Valley 95, Perfectly rustic Embossing, The Pink elephant 278, Through the purple Haze 69 , DL art linky Nov, 613 Avenue crafts 99, Sentimental Sundays 234 Heartfelt thanks, Great Impressions Nov Thankful thoughts, That Craft Place 23, All sorts Challenge 286 [no design papers],Brown Sugar Challenge 2 or more colors,

Sospeso Transparente Ice Crystal Flowers

$
0
0
Sospeso Transparente flowers
Sospeso Transparente 
Hi friends sharing yet another Sospeso Transparente floral project. This time with "Ice crystals" technique!
Sospeso Transparente ice crystals
Made a Christmas themed lantern with Sospeso Transparente flowers. You can read about the Italian craft of Sospeso Transparente here : Sospeso Transparente Bouquet tutorial 
Sospeso Transparente techniques
Sospeso Transparente 
To run you through how I made the Sospeso Transparente flowers : my  flowers started off as flat designs on a special plastic sheet. They were cut , heated and embossed to create 3 dimensional Sospeso Transparente flowers
Sospeso Transparente flowers
Sospeso Transparente 
Used hot glue to stack some of the flowers together.
Sospeso Transparente flowers
Sospeso Transparente 
Inked the edges of the flower petals using red permanent markers and glass paint[ if you are using glass paint use a thin paint brush]
Sospeso Transparente glass paint
Sospeso Transparente 
Achieved the Ice crystal Effect by mixing  equal amounts of Vetrification gel and Ground crystal glass [invented by Sospeso Transparente inventor Monica Allegro] in a plastic dish and applying it over my Sospeso Transparente flowers.
ground glass Sospeso Transparente
Sospeso Transparente ice effect
The toughest part is that you have to be really patient and not touch or move the flowers as they dry or the crystals will fall off !! [Best left overnight so that you are not tempted to poke them!]
Sospeso Transparente ground glass
Ice crystal Sospeso Transparente 
You can completely cover your flowers and leaves or just give a splattering of ice crystals
ice crystal Sospeso Transparente
Sospeso Transparente leaves
I added my Sospeso Transparente flowers to a hanging lantern whose base is removable to fit in an LED light.
3 d volume decoupage
Sospeso Transparente 
You can make your own  centers for your Sospeso Transparente flowers like I did in the Sospeso Transparente tutorial  or add pollen like the ones here
Sospeso Transparente ice crystals
Sospeso Transparente
I hope you enjoyed looking at this new craft of Sospeso Transparente designed by Monica Allegro
Sospeso Transparente ice effect
Sospeso Transparente flowers
Do tell me how you liked my decorated lantern.
Supplies : All Sospeso Transparente supplies and Pollen from Crafters Corner
Linking to : DL art Dec linky,All crafts Dec/ Jan, Crafting Cafe [ my fav craft from 2014 is Sospeso Transparente !], Try it on Tuesday[Christmas is coming]
Viewing all 609 articles
Browse latest View live


Latest Images