Quantcast
Channel: Cards and Crafts
Viewing all 609 articles
Browse latest View live

Handmade Ceramic Flowers and Embellishments

$
0
0
Handmade Ceramic Flowers
Handmade Ceramic Flowers 
Dear friends,in the recent past I have bombarded you with lots of foam flowers..well now sharing ceramic flowers made using ceramic powder and white glue.
I used 2 pattern papers to alter this box into a memory box.
Altered Box
Lots of different types of handmade flowers adorn this memory box : handmade foam roses ,quilled paper flowers, and handmade ceramic flowers
Handmade ceramic flowers
The front of the box has MS heart punch lacy border with  pearly  plastic butterflies and a handmade ceramic butterfly
Handmade Ceramic Butterfly
I used a plunger cutter to cut the butterfly from homemade ceramic dough.I experimented with normal pearl acrylic paint but it didnt look so nice.Later experimented with spray paint and got a beautiful shiny silver hue on my handmade ceramic butterfly.
Handmade Ceramic Butterfly
I kept the ceramic flowers and leaves uncolored..just added pearl centers and distressed the petal edges to blend with the rest of the box! I love how delicate looking yet sturdy these ceramic flowers are!
Handmade Ceramic Flowers 
These ceramic flowers are the successful ones of my experiment.They were super easy to make but my 2nd attempt at making homemade ceramic dough didnt turn out too good!!Once I perfect the ceramic dough recipe and techniques will share a tutorial on how to make your own handmade ceramic flowers.
Handmade Ceramic Flowers 
I lined all sides of the box with floral and fruit themed pattern paper [DCWV]and added more handmade ceramic flowers.
Handmade Ceramic flowers
The foam roses made with this Foam Rose tutorial has silver handmade ceramic leaves.
Handmade Foam flowers
This memory box was inspired by our family vacation to Malaysia and I incorporated some of my most cherished memories into it [Picking up beautiful shells at Langkawi beach and walking with peacocks at the largest Aviary in the world at Kualalumpur]
Shell craft
Inserted a die cut paper net [Provocraft die]with distressed edges under the ceramic leaves and places some shells and a pearl near the foam rose flower.
Handmade foam flowers
I spray painted the chipboard peacock and placed it on a 3 D pedestal made of 3 folded MS punch hearts.
Handmade foam flowers
I used a different Foam rose tutorial to make this foam rose
Handmade Foam roses
Here is the back side of the memory box with MS punched lace and green lace
Handmade Foam flowers
Distressed the edges of  Spellbinder floral oval die cuts and popped up the stamped "Magical Memories" sentiment on a quilled shape[ can be better seen in a side view picture above].To gel wit the rest of the project, added some brown and pink quilled flowers!
Quilled flowers
Added pearly buttons on the centers of the quilled flowers.
Quilled flowers
I hope you are still with me in this visual trip!! And wish me luck to get the ceramic dough recipe perfected so that I can soon share a tutorial to make lots of ceramic embellishments including handmade ceramic clay flowers.
Handmade Ceramic Flowers 
Linking to BGC [this memory box is the gift],Crafters Corner[More than 3 embellies:Flowers,Butterflies,chipboard,buttons,pearls ,shells;2 pattern papers used,and I sentiment],DCAM [shabby chic],Color conceptions [distress ink],

How to make a Pyramid- School Project

$
0
0
 Solid Shapes School Project
Solid shapes school project
My 7 year old is learning about solid shapes in school and for her school project she had to take a chart or a 3 D project. Those who have been around my blog for some time will know my daughter always chooses the more difficult option![Remember our 3D model of the Taj Mahal!!]
But I must say it was fun making the 3 D paper cube, cuboid , cone and pyramid.
Solid shapes school project
The washi tape flags with the names of the solid shapes was surprisingly my little one's idea[ and no she didnt see it on pinterest!!!]
Solid shapes school project
I had once before made a Pyramid for a food pyramid school project but hadn't bothered to blog about it as I felt it was so simple.My hubby's aunt is a school teacher and recently she told me how she had struggled to make a food pyramid for her students as there were no easy tutorials on the net on how to make a pyramid
So sharing our easy and quick 3 D Pyramid Tutorial
Materials
  • Paper -thick chart paper or card stock preferred
  • Glue- Fevicol MR is my preferred glue. A glue stick wont work and avoid runny glue.
  • Scissors
  • Scale 
  • Scoring tool - use a blunt knife or a ball point pen which has run out of ink
  • Optional -Scoreboard - makes measuring and scoring easy and quick
The easiest pyramid is made from a square of paper! I started of with a 6 x 6 inch card .Scored [means take a ruler and run a blunt pen along]it every 2 inches one side first, turn 90 degree and do the other side. Choose any size of paper and divide it into 3 parts.So its easiest to work with a paper measuring a multiple of 3 eg 6 inch, 9 inch, 12 inch etc !!
When you score the paper into 3 both ways your paper gets marked into 9 squares  as shown in the photo below of the paper pyramid tutorial
Pyramid tutorial
Chop off the corner 4 squares as shown in the photo of the pyramid tutorial
Paper pyramid tutorial
Mark the midpoint of the outer 4 squares as shown in the pyramid pictorial
Paper pyramid tutorial
Score from the marked midpoint  to the base corners of the outer squares as shown.
Paper pyramid tutorial
Once you have scored all 4 outer squares,snip off small triangles from all the flaps as shown.This step helps to glue your 3 D pyramid easily
Paper pyramid tutorial
Fold in all the flaps at the score lines and now you have triangles around the base square of your pyramid.
Paper pyramid tutorial
Next fold up all 4 triangles and you have a 3 D paper pyramid!
Paper pyramid tutorial
The last step which is gluing all the flaps looks the easiest but is actually the trickiest because if you don't have patience to let your glue dry ...your pyramid falls apart! Apply glue on all the flaps of the triangles one by one and hold in place by holding the apex of the pyramid
Paper pyramid tutorial
If you are working with kids its highly likely your pyramid will have lots of glue smears..mask the mess by adhering pattern paper like we did for one of our pyramids! We stuck washi tape on toothpicks and my little one wrote the names of the shapes on the washi tape[ a gift from Priya].The "Prisha" was made by die cutting foam.
Solid shapes school project
I know for the seasoned paper crafter making a pyramid may be an easy task but I am sharing our pyramid tutorial for all the kids , harried moms and hardworking teachers to make school projects a tad easier!!

Easy Paper Decorations Tutorial

$
0
0
 Paper Decoration
Dear friends Thank you so much for the sweet support on my Paper Pyramid Tutorial.I had made 2 extra pyramids for that tutorial and we used them to make easy Paper decorations .
Easy Paper Decorations
My daughter and I made these diamond shaped shaped paper decorations using 2 pyramids.Check this link on How to make a paper pyramid
Diamond ornament
These paper ornaments are super easy to make. Stick 2 pyramids together at the base.
Paper decoration tutorial
And you get a diamond shaped paper ornament!
Paper decoration tutorial
Our glue smeared paper diamond didnt look  so cute so we stuck pattern paper on it to pretty it up. The base of our pyramids are 2 x 2 inch squares and to cover the diamond we used 8 triangles made from of 2 x 2 inch squares of pattern paper. 
Paper decoration tutorial
To get the perfect sized triangles to cover your diamond ornament:Mark the midpoint of one side of the 2 x 2 inch square and cut from this point to both bottom corners of the square to get a triangle which will perfectly cover the side of your paper diamond ornament.
Paper decoration tutorial
I didnt like the gap between the pyramids so stuck a Hello Kitty ribbon on the center of our paper diamond decoration.
Easy Paper Decorations
My little one had a lot of fun sticking Christmas themed stickers on each face of our paper ornament .To add to the festive look we added glittery pom pom balls on the tips of our paper diamond decoration.
Easy Paper Decorations
These easy DIY paper decorations can be made in all sizes and themes and would look just awesome to showcase family photos. 
Another idea is If you hoard stickers like me these paper ornaments would be a fun way to use up some of that sticker stash!
Do tell me how you liked our easy paper decoration.
Here are links to some more easy paper decorations
Easy 3D Paper Decoration Tutorial
Paper Flowers Party Decoration Tutorial
Paper Star Tutorial

Altered Tissue Box and Leaf tutorial

$
0
0
Paper Flowers
Hi friends Thank you so much for the heart warming comments on my Diamond Paper Decoration Tutorial. I had this un glamorous  tissue box lying around my house and decided to cut up some pretty floral pattern paper to alter it
Altered Tissue Box
Punched the pattern paper with a Martha Stewart Lattic heart and added pearls, tiny plastic flowers and pearly leaves on the front of the altered box.
Altered Tissue Box
Made a stick pin with a shell shaped bead ,pearls and a metallic star shaped bead.Added a metal framed charm sentiment "bloom" to my paper flower!

Paper Flowers
Added a pearly border to a lattice heart border I punched on a pink polka dotted pattern paper .Added my favorite acrylic white butterflies to flutter by on my altered tissue box
Paper Flowers
I have an obsession with leaves- Not only do I handcut my leaves, I cant resist buying leaf punches and now that I have a die cutting machine I cant resist leaf dies!!
Sharing a mini tutorial to make a leafy branch
On Pinterest I realized that sometimes even the simplest of pictorials are pinned! My mini leaf tutorial on this Recycled CD Box was so simple but its actually been pinned quite a bit!
So sharing a 8 simple paper-crafting tips especially for newbie paper crafters to add a bit of that extra jazz to your leaves be they hand-cut, die cut or punched .
Paper blooms
  • 1.Cut out your leaves from pattern paper! -I punched out these leaves from a swirly pattern paper.
Punchcraft leaves tutorial
To get your punched leaves to point to either side punch out  some leaves on the reverse of the pattern paper!
  • 2.Make your leaves stand out by inking your leaf edges using a stamp pad and sponge
Punchcraft tutorial
The pic shows a Faber castell ink-pad[available in India] and my daughter's blackboard duster sponge which I used to apply the ink to the edges of the leaf!
Punchcraft leaf tutorial
  • 4.Double shade your leaves with 2 shades of green
Punchcraft tutorial
  • 5.Crease your leaves for a 3 D look- In this leafy bunch I just folded the leaves in half and didnt use any other tool
Punchcraft tutorial
  • 6.Draw veins with a green/silver/gold gel pen- your leaves will literally shimmer!
Punchcraft tutorial
  • 7.Make a branch by sticking your leaves on a piece of sturdy green card stock.
Punch craft leaf tutorial
  • 8.Add dew drops on the leaves and paper roses using glossy accents[More examples here:Aperture card tutorial]
    Paper flowers
Now back to my altered tissue box,It has 3 compartments on the front and I lined the inside of these little compartments with the same floral paper too.
Altered Tissue box
At times projects look more glamorous in their photographs but I wasnt so lucky with this one and for the life of me I couldnt capture the true beauty of this altered box on camera!!
Supplies:Pattern Paper:DCWV Itsy Bitsy,Dies: Cheery Lynn Flourish,Marianne Leaves,Itsy Bitsy Spiral daisy,Punches: Jef leaf,MS lattice heart


Edited: this project got a honorable mention at Crafters Corner
and also at Lulupu


Beaded Necklace and Earrings

$
0
0
Handmade Beaded Necklace
Dear friends my regular readers will be quite surprised to see this post as I am not much into beading or making jewelry!! [But have shared a simple beaded flower tutorial earlier]
Well this necklace is my 7 year old daughter's creation and like any mother I am so proud of her for designing it ...I just had to share it!
Handmade Beaded Necklace
My daughter often goes craft shopping with me and she chose the diamond shaped pink floral beads herself from our local craft store Itsy Bitsy. She threaded the beads on tiger tail wire and I used the awesome and supremely talented Radhika's tutorial to make a clasp for her necklace. 
Its a super simple creation but please be kind my lovely blogger friends!!

Recycling Crafts -Tin Can alteration

$
0
0
Recycling crafts
Recycling Crafts
Many of my readers know that a couple of months back I moved into a new home-well a lot of my crafty projects these days are home decor crafts for our new home!
Recycling Crafts
I wrapped this empty tin can in glitter textured paper and went to town adding glittery butterflies ,tiny 2 toned mulberry roses and large handmade paper roses
Paper Roses
Paper Roses
This view shows the many layers of my  shimmery 3 D decoupage flower fairy!She has nearly 6 layers and required a lot of patient cutting and layering but well worth all the effort!
Handmade Paper Roses
This altered tin literally shimmers when light falls on it as I added lots of glittery leaves and the decoupaged fairy is made of shiny sparkling paper!
3 D Decoupage
Tip to make more natural hued flowers -Use 2 shades of paper to make your handmade flowers:I used deep pink chart paper for the inner petals and  pale pink card stock for the outer petals of my paper rose
Handmade Paper Rose
I have made so many crafty friends in blogland who continually inspire and encourage me.One significant influence for altered projects is my amazingly talented blogger friend Audrey's altered and recycling crafts.
Recycling Crafts
I have not yet decided what I am going  use this altered tin can for - seems a bit too gorgeous as a pen stand !Maybe I'll use it as a candle stand for the festive season!What do you suggest my dear friends?

Supplies : Dies :Cheery Lynn Butterflies[Priya],Provocraft Butterfly[Itsy Bitsy],Cheery Lynn Olive branch,Spellbinders floral oval,rectangle,rose creations[[Crafters Corner] ,3 D decoupage sheets-[Devi Co] ,Pattern Paper -DCWV Botanical Stack [Itsy Bitsy],Glitter Paper-Itsy Bitsy,Lace and Pearls-Commercial Street Market
Linking to Catchy Challenges Glitterify,Crafters Corner New,Diana's Link Pink,
Edited : This project was TOP TIP winner at Top Tip Tuesday

Zardosi Painting

$
0
0
Zardosi Painting
Dear friends this Zardosi painting is my 7 year old daughters work.She had 17 days holidays recently and I really struggled to keep her busy [hence the paucity of my blog posts and blog visits!]
We picked up a Zardosi painting kit [labelled as "Jardosi" on the kit] from a fancy store near my clinic and though I had no prior idea what Zardosi painting was we had fun with our version  of Zardosi painting!
Zardosi Painting
Here are the materials we used
Rhinestones
Glitter paint and 3 D Glitter glue
Paint brush- to apply the glitter paint
Scissors to cut the Zardosi thread
Glue-should be of good quality so as to stick the rhinestones and Zardosi metal thread
Zardosi thread- we used gold metallic thread
Velvet cloth
Zardosi Painting Tutorial
My kiddo used a paint brush and glitter paint in the first step of the Zardosi painting
Zardosi Painting
The kit came with multicolored rhinestones but it was a struggle for my daughter to apply glue to tiny rhinestones so we improvised with rhinestone stickers [so handy while crafting with kids]
Zardosi Painting
I was surprised to see that my little one's hands had got steady enough to handle 3 D glitter glue to highlight the flowers on the Zardosi painting!
Zardosi Painting
The toughest part was actually the " Zardosi" itself! The Zardosi metal thread was spring like and if you pulled it the slightest it would stretch and thin out so it took a lot of effort to glue the Zardosi in place!
Zardosi Painting
We have a Cocker spaniel at home [you can see him here:Paper Flower Tutorial]and it was a big challenge keeping golden doggy hair off the black velvet of our Zardosi painting!
Zardosi Painting
My little one is so proud of her sparkling glittery Zardosi painting and was ecstatic when I promised her we would get it framed!
Supplies : Rhinestone stickers[Big Market,Sahakarnagar],Zardosi Kit[Fancy Store Sahakaranagar]
Linking to Crafters Corner [New Home],Catchy Challenges[Glittery]

Fancy Fold Pop up Card Tutorial

$
0
0
Pop Up Card
Pop up card
Dear friends its been quite some time since I shared a pop up card. Sometimes craft challenges can really inspire creativity and the whole concept of this card was inspired by BGC's "over the edge + multilayered" .
Each layer of this Fancy fold Card goes over the edge of the layer on top and when folded up the multiple layers tuck in and disappear!
Pop Up Card
The card actually has a simple pop up mechanism but I did spend quite a bit of time designing it as I wanted to perfectly incorporate 3 layers of gorgeous Spellbinder die cut shapes in this fancy fold pop up card.
Pop up card
The Poppies are a 3 D decoupage and has around 4 layers.I am so in love with the little red ruby crystals as I actually made them by dipping white beads from a broken bracelet into a bottle of red glass paint !
Fancy Fold card
I used the left over golden metal thread from our Zardosi painting to tie the rubies on my leafy vines.[Here is the tutorial link to the leaves].The Cheery Lynn die cut swirly leaves  with the rubies go all over the edges of my pop up card.
Pop up card
Here is the tutorial for this pop up card - its a modified version correcting a design flaw in my initial design!
Pop Up card tutorial
You dont really need any fancy tools or dies to make this type of pop up card but sharing the tutorial using the most popular type of Spellbinder dies .Use 3 of the largest Spellbinder rectangles[largest] and 2 of the next smaller size. [I used the rectangle instead of the oval for the central panel to help the card stand well]

Pop Up card tutorial
Score 2 of the largest rectangles at 2 and 3/4 inch and both the smaller rectangles at 2 and 1/4.
Pop Up card tutorial
Fold at the scored lines as shown above in the photo of the pop up card tutorial

Pop Up card tutorial
Take a strip of thick card stock[ I used Ivory sheet from the local stationary store] 9.5 x 3 inches and score at intervals of 2, 1 and 3/4, 2, 1 and 3/4  inches. Valley and mountain fold as shown above.
Pop Up card tutorial
Apply glue on the first 2 panels of your base strip and glue the folded large rectangle on to your base strip as shown above
Pop Up card tutorial
Make the pop up mechanism by scoring a 3 and 1/4  x 3 inch strip of card stock at 3/4, 3/4 , 1  and 3/4 inches. Snip off the corners to help you glue the tabs of your pop up. Mountain fold all score lines as shown above.
Pop Up card tutorial
Apply glue on the tab of your pop up mechanism strip and line it  and stick it at the 1st fold line of your base card as shown
Pop Up card tutorial
To get a perfectly flat folding pop up card, fold down the pop up strip and apply glue on the other tab as shown.Fold over the card and your pop up mechanism strip will have glued at the correct place. 
Pop Up card tutorial
When you open it up your pop up mechanism would have formed a step!On this pop up step, stick on the folded smaller rectangle as shown [like a shelf!]
Pop Up card tutorial
Make the step like layers on the other side in the same way. Lastly apply glue to the central 2 inch part of the base strip  and stick the 3rd large rectangle![I found folding it all up at this stage helped give perfect alignment!]
Pop Up card Tutorial
And your Fancy fold  Pop Up card is done.
Pop Up card
The photo collage  shows how the pop up card folds up on itself completely ,all the layers disappear and it can  be mailed flat in the true fashion of a pop up card!
Pop up cards
Want to try some other types of pop up cards?Here are links to Pop up card making tutorials
And if pop up cards seen too difficult here is a link to a compilation of Card making tutorials.

Linking to BGC[ 3 layers of spellbinder die cuts on the base card + 4 layers of the 3 D decoupage; Over  the edge-each layer+ leaves, red rubies, red dangler in the center],Craft Spot 116


Photosynthesis School Project

$
0
0
Photosynthesis Chart
Dear friends these days most of the crafty stuff  I do with my 7 year old don't get posted on the blog as taking photographs is often such a chore ![Do you ever feel that way?] She was so proud of this particular 3 D chart on photosynthesis that I did snap a couple of pics before it was rushed off to school!
Photosynthesis School Project
My little one is allowed to use all my craft supplies for school projects and she really went to town using  die cut alphabets and glittery leaves!The Carbon dioxide , Oxygen and food molecules are thermocol balls!
Photosynthesis School Chart
We made a tree trunk  by rolling thick brown chart paper and sticking just the edges on to our chart paper
3 D Photosynthesis chart
Added a grassy border over the 3 D embossed tree trunk
3D Photosynthesis Chart
I didnt have the heart to say no when she raided my stash of quilled flowers!
Photosynthesis 3 D chart
They are learning about plant parts so we made a bunch of roots for our paper tree! Just posting this so that it may be of help for anyone contemplating a "plants themed " school project!
Supplies: Dies: provocraft leaves,Spellbinders Donna Salazaar Alphas,Cheery Lynn Olive branch negative,Cheery Lynn Grass,Itsy Bitsy Circle .Embossing Folder: Darice wood grain.

Ice cream Stick Crafts - Handmade Star Tutorial

$
0
0

Ice cream Stick Crafts 

Handmade Star Decoration Tutorial

Ice cream Stick crafts
Dear friends  sharing a super simple and quick handmade star decoration you can whip up for the festive season with something you may just be having lying around the house: 5 wooden ice cream sticks
These handmade stars will look great on your tree or mantle piece and for crafters who sell handmade crafts I bet these wooden stars can be dressed up in your unique style [say quilling,beads,clay craft etc]to be a hit at your craft stall!
Popsicle stick crafts

Materials required

  • Ice cream sticks -Just 5 sticks are required to make 1 star so this is an ideal recycling craft to use up hoarded lolly sticks!
  • Double sided Foam tape -believe me I tried other options and the foam tape was the quickest, easiest and sturdiest adhesive to make your handmade star!
  • Scissors to cut your foam tape -Pictured above is my new Tim Holtz nonstick scissors ...I love it so much...no more sticky scissors with foam tape cutting![Earlier I used to steal my daughters scissors to cut foam tape...so wicked of me!].See this post for Paper Cutting Tools
  • Optional to decorate your ice cream sticks:
    • Paint 
    • Washi Tape or Fabric tape - quite the rage these days!
    • Decorative Gift wrapping tape [the shiny glittery ones seen in the picture above]
    • Rhinestones, Beads,Glitter
    • Ribbon 
    • + I'm sure you can think of lots more stuff you can use to jazz up your star !

How to make a Popsicle Stick Star

Popsicle stick crafts
Start by laying the lolly sticks one  on top of the other step by step as shown above in the pictorial of the Popsicle stick star
Popsicle stick crafts
Believe me getting a perfect 5 pointed star in the first go is tricky! If you are obsessed with symmetry like I tend to become at times...concentrate on the pentagon in the center and you''ll make a near perfect ice cream stick star!
Washi Tape Crafts
If you are crafting with kids you can always let them paint the ice cream sticks or if you prefer a quicker  mess free option use washi tape , fabric tape, decorative cello-tape or even ribbon to wrap around both sides of the ice cream sticks.
Ice cream Stick crafts
Once you are happy with the star shaped arrangement of the sticks ,use double sided foam tape to stick the points of the ice cream sticks. You can even reinforce the stars by adding more double sided tape at the central intersecting parts of your ice cream stick craft star.
Ice cream Stick crafts
If you are making a batch of stars like I did use your first star as a template and place the ice cream sticks for your next star atop it and stick it with foam tape in a step wise manner as you go!
Ice cream Stick crafts
The lolly stick stars look rather pretty  just wrapped in tape but they were so quick to make I had a go at jazzing them up a bit more! Added red foam flowers and glittery green leaves to make a traditional Christmas colored star
Ice cream stick crafts
The silver tape in the star below really sparkles and I went a bit crazy and made it even more sparkly with sparkling sequin flowers,glittery silver leaves and a glittery Christmas tree!
Popsicle Stick crafts
My daughter and I like the polka dotted red one the best.Which is your favorite ice cream stick star?
Ice cream Stick crafts
I hope this simple tutorial will come in handy for that quick last minute decoration for the festive season.Do tel me how it is.
Linking to Catchy Challenges[ Glitterify],Craftionary
friday link party

Easy Interactive Card Tutorial

$
0
0
Interactive Slider Card
I love interactive books and cards and this particular tutorial is for a super simple easy to make interactive mechanism which can be used in cards,scrapbooks or even a school chart like we have done .
Kinetic slider card
The pic I have used to illustrate the sliding mechanism in this interactive card is of our  Lhasa-apso Snowy who is sitting majestically on the bed posing for the photo!
Yesterday my 7 year old  had to take a chart on "time measuring devices" to her school.
Clocks school project
She had to write interesting facts for each type of clock and we made interactive sliders below each clock picture to pack in all the extra information and still keep the chart "clean"!!
Clock Interactive school project
It was fun reading up about various crazy types of clocks [ Have you heard of an incense clock or a calibrated candle clock?!!]
Interactive school project
Rather than type out the "facts' like we had done in the Festivals of India school project this time my kiddo proudly used her own cutie handwriting on all her hidden sliders!
Clock school project
As the center focus of her school chart we made an interactive clock with moving hands using a split pin [brad]
Interactive clock
We also made an interactive "princess" swinging pendulum clock using a hidden brad
Interactive School chart

How to make an easy Interactive Card

Each photo we used in the school chart has a pull tab which when pulled slides out to reveal a hidden message.
This slider mechanism is quite easy to make but I am posting lots of step by step photos so that it may benefit a "non crafter" too!!
Interactive card tutorial
Materials required

  • Thick sturdy card stock [Indian readers- ask for Ivory sheets in stationary shops] - size depends on the size of your picture
  • Scissors
  • Double sided foam tape - the narrow 1 cm variety is the best for slider cards
  • Glue
If you want to make a slider for photos ..paste the photo on card stock and create the slider mechanism on the other side of the card.
Interactive card tutorial
Stick double sided tape on 3 sides of the card leaving one side open for your slider
Interactive card tutorial
Cut a card strip to loosely fit within the area framed by the foam tape
Interactive card tutorial
To make a stopper mechanism for your slider strip stick squares of foam tape at the slider opening as shown above
Interactive card tutorial
Cut off approximately 1/2 inch strips off your slider strip at the top and bottom edges as shown leaving around an inch on one side to  get a T shaped slider
Interactive card tutorial
Test if your slider moves freely by sliding it in and out of the foam tape framed card.
Easy Interactive Card Tutorial
The T stopper of the slider strip bears the maximum wear and tear in this type of slider card so it needs to be strengthened.To do this fold and stick as shown above
Easy Interactive Card Tutorial
Your slider mechanism is ready. You can trim excess lengths of your slider strip at the region where you will pull it.
Keep the T slider strip within the foam framed area and Peel off the paper from the foam tape,taking care the T slider doesnt stick to the tape.
Stick to a base card or a sturdy chart to make your fun kinetic card.
Kinetic card tutorial
Of all the types of clocks ,my daughter was terribly fascinated by the water clock also called the Clepsydra and wanted me to make a 3 D model but we compromised by making an interactive water clock!
The water clock also works on a sliding mechanism.On pulling the  slider strip the shiny holographic water empties from the container!!
Slider card

I modified the basic slider card tutorial explained above to make this interactive water clock!
I hope this interactive card tutorial comes in handy to add a bit of fun in card making ,scrapbooking or to jazz up any type of presentation at school,college or office!
Do tell me how you liked it!
Linking to Lessology[the princess head on our swinging pendulum clock is a broken toy and I recycled an old cocktail stirrer to mount the princess head to make the pendulum],Diana's Linky Nov

Rapunzel Pop up Card

$
0
0

Rapunzel Pop up card
Dear  friends  I am sure that every little girl [and the not so little ones too] who saw the Disney movie Tangled was enchanted by Rapunzel's character !
Sharing a Tangled theme pop up card I had made with a pop up tower and Rapunzel jumping down from the tower on to the waiting horse.
Princess Pop Up card 2
Princess Pop up card

I found the hero  Flynn Rider quite charming and had to add him dashing through the woods!
Used corrugated card and moonstone paper to make the grassy fields in the pop up scene
On closing this interactive card  the pop up tower goes absolutely flat and the card closes flat for mailing! The type of pop up in this card is called a cylindrical pop up and is rather tricky to execute so I wont subject you to a tutorial this time!! [Also I cant seem to find the website where I got the idea from]
Here are post on a home made Rapunzel themed Cake and Rapunzel themed Birthday decor
Here are links to Pop up card tutorials
Here are links to more than 30 Card making tutorials

Castle shaped slider card tutorial

$
0
0
Pop up Slider castle card
Dear friends I had shared this Castle slider card some time back as my Guest DT post at Itsy Bitsy. Posting it on my blog for  my new readers and followers
Pop up slider card
This interactive pop up slider "castle shaped card" can be a fun birthday card or invitation card .The central fort of the castle can be pulled up to reveal a space to write the Invitation and party details.
Castle shaped slider card
Sharing how to make a Castle Shaped Pop up Slider Card.[Click on the pictures for a detailed view]
Materials Required
This is an easy card to make which does not require any fancy tools.
Basic Supplies
Card Stock -Sturdy card stock is a must.Handmade paper will not give as neat an effect in this slider card.
Craft-knife, Scissors,Scale
Cutting mat  [or kitchen cutting board]
Double Sided Foam tape,Glue

If you want to jazz it up a bit..
Big Shot /Other Die cutting Machine
Embossing folders : I used Itsy Bitsy spots folder and Itsy Bitsy swirls.
Dies : to make the castle door [Itsy Bitsy Nesting dies] and domes [Scallop circles]
Punches : Square
Materials Required
Measurements are not really important for this type of card but to make things easier giving approximate measurements.
You need card stock for the front, base and slider piece.For the front of the castle card...take half of an A 4 card [or 6 x 8 1/4 ]

Pop Up slider Card
Use a ruler and craft knife to cut 2 vertical lines from either edge leaving at least 1 inch from the top and bottom edge as shown.Join the 2 vertical cuts horizontally at the lower ends as shown in the slider tutorial
Pop Up slider Card
Score horizontally to join the upper ends of the vertical cuts or use a scale to fold up the flap as shown.Fold down this flap in half as shown.
Pop Up slider Card
The front of your slider card will look like this now. Take a slider piece of approx
 8 1/4  ½ inch and fold up one edge[approx 1/2 to 3/4 inch] 
Pop Up slider Card
This step is optional: I wanted to make my slider a castle fort so chopped off rectangles 1/2 x 2 inches from the top edges as shown
Pop Up slider Card
Attach the lower folded tab of the slider to the back of the vertical cut flap as shown.
Pop Up slider Card
If you plan to emboss your card front do so before attaching the slider pieces.Keep the lower part of the central vertical flap un-embossed  by keeping it outside your embossing folder as embossing tends to weaken most cardstocks and you want the central flap sturdy!
Pop Up slider Card
For  the Pop up piece ..you can stamp, quill,draw or cut out a castle shape like I did. From a 4 x 5 inch pearl pink card stock I marked 1 inch from either edge and chopped off 1/2 x 2 inch rectangles . Further chopped off a part of the central rectangle to get my castle shape..do whatever appeals to you!
Pop Up slider Card
To further decorate your pop up castle..do whatever you fancy but dont make it too bulky or your castle wont stand up well! 
Pop up Castle
 I  die cut a door in my castle and then embossed it  using the spots embossing folder.I die cut and embossed scallop circles to make the domes of the  castle card.Simple triangles would work just as well for the castle domes!
Pop Up slider Card
The glue dots came in handy sticking the domes to the castle[ you need a bit of  patience if you use regular glue on embossed card stock!]
Pop Up slider Card
Punched out squares on a 1 inch width pearl card stock to make my castle accents which were stuck to the castle with double sided foam!
Pop Up slider Card
Stick on the castle to the front of the lower half of the central flap
Pop Up slider Card
On the back of the castle card stick double sided foam tape on the lower edge and sides as shown.Leave enough gap near the central flap so that your slider can move freely.Stick it to a same size or larger base card.
Castle shaped card
Do not stick too tightly as you need a bit of gap between your base and top card for the slider to move freely.
Castle shaped card 
My daughter loves pink and purple so that was what heavily influenced the colors of this castle shaped pop up slider card!
Castle Shaped Card and Box
We had also made Castle shaped boxes as party favor boxes to go along with our castle shaped cards
Do share how you like this Interactive card tutorial

Thermocol Crafts- Lotus tutorial

$
0
0

Thermocol craft lotus
For quite some time now I have been fascinated by thermocol /styrofoam ball ornaments .
You can dress up thermocol balls with ribbons,fabric scraps,pretty paper ,sequins or beads [lots of ideas!!]
I had a bit of a tough time following some of the  for pine cone tutorials on the net and finally decided to make my own version…it turned out looking like a lotus!!

Thermocol craft lotus
So sharing how we made our thermocol lotus ball!

Materials Required for the Thermocol Ball craft
Lotus flower tutorial
  • Thermocol balls – we used 2 inch sized ones.
  • Ribbon ,fabric or paper -I used 1 inch width pink ribbon.Use sizes and colors you want.
  • Pins
  • Scissors
From the pink ribbon Cut one square[ 1 x 1 inch] and many 1 x 2 inch rectangles [cut rectangles double the width of your ribbon/paper]
Lotus tutorial
Fold the rectangles into triangles by folding up the lower corners to meet the upper edge.
Ribbon flowers
My ribbon is kinda satiny and stiff like paper so I could fold and the creases remained
Ribbon flower tutorial
If you are using fabric or normal ribbon you will have to  hold the fold with your fingers
Ribbon flower tutorial
When you have folded up the other corner you will get a nice triangle.Doesnt matter if you get imperfect overlapping edges!
Ribbon flower tutorial
Pin the square onto the thermocol ball
Ribbon flower tutorial
Take the triangle you had folded and Pin the lower 2 corners of the triangle on to the corners of the square as shown keeping the flaps hidden inside.
Ribbon crafts
Keep pinning triangles to cover adjacent corners of the square keeping the lower edges of the triangles in a line on the thermocol ball
Thermocol Ball crafts
You can even use one pin to hold 2 adjacent triangle corners as you get used to pinning on the thermocol ball!
Thermocol Ball crafts
On completing a layer of triangles atop the square start pinning the next layer lower down .
Thermocol Ball crafts
My next layer also had just 4 triangles. Here is the side view showing how the triangles are overlapped on the thermocol ball
Thermocol crafts
Complete the thermocol ball lotus by pinning more triangles and finishing off with green ribbon leaves!
Do tell me how you like this thermocol - ribbon Lotus!!
I think it would look cool as a home decor and for religious souls I guess it would be lovely as a  Pooja  decoration for goddess Lakshmi!
PS: the stand for the lotus may be familiar to some of you.Here is how I made it : Fancy fold card tutorial
Linking to Crafters Corner Festive [Lotus as decor for Hindu festival],BGC[Inspired by the lotus pond garden I see when I look down my balcony!!]

Foam Crafts - DIY Dinosaur Mobile

$
0
0
Foam crafts 2
DIY Dino mobile
Dear friends I better issue a warning at the beginning of this post :”Not for the faint hearted!”
My 7 year old daughter is learning about Reptiles and Dinosaurs in particular. Yesterday she came home from school and demanded we make a large diorama with lots of dinosaurs as another child had brought a diorama to school.


Like all moms I do have my “not in a mood to do anything” days…yesterday was one of those days! Eventually I give in seeing her enthusiasm …but alas I didnt have a good sturdy box for a large diorama!
Foam crafts 5
DIY mobile
This was one of those times when being a blogger came in handy!I follow a blog on felt crafts by Carla and she makes the most adorable mobiles…so ambitiously I decided to to make a dinosaur mobile!
We had just 2 hours before my daughters bedtime so it was a super fast project and I dont have step by step photos to share.
I recycled the frame of an old toy clock to make the frame of our handmade dinosaur mobile.
Foam crafts 3
Dinosaur school project
Tied up all  my daughters toy dinosaurs  to the frame . We didnt have time to colour the white ropes so my daughter prettied it up by wrapping sparkly green pipe stem cleaners on all the ropes of the dinosaurs mobile.
Foam crafts 1
Foam crafts
The frame looked ghastly with all the ropes tied on, so we cut up grass freehand from textured foam and glued it onto the mobile frame with the glue gun [I love the glue gun…it  makes school projects such a breeze!].The red roses are also made from foam.
We strung alpha beads on pipe stem cleaners  to write my daughters name and wrapped it on our mobile frame
She also wanted to add her toy snakes on the mobile and eeeek they did look scary all wiggly on our DIY reptile mobile!
Foam crafts 4
Dinosaur school project
My poor husband had to help carry it to school!! It was a big hit in her class and she proudly came and showed me the “sticker” she had got for it !!
I hope this idea comes in handy for a unique school project! Do tell me how you like it
Here are links to more Foam crafts :

Linking to Lessology[Recycled items:old clock frame to make mobile frame+All the ropes are recycled ones.Toys: All the snakes and dinosaurs]

Scrapbook Layouts with Foam

$
0
0

scrapbook layouts  2
Scrapbook Layout

As my regular readers will know I am not much into scrapbooking .[Here are my earlier 2 scrapbook layouts : Interactive Scrapbook , Tulip Flower tutorial ] but my  daughter seems to find it interesting.She loved choosing the photos to scrap and loved deciding on the embellies.So what  you are seeing are kiddy style fun scrapbook pages.
scrapbook layouts  3
Baby Scrapbook Layout
The chubby cutie framed in the glittery snowflake border [cut out on foam] is my daughter when she was 4 months old.We used to take her around in her rocker seat in which she was so comfy.She would sleep, eat and play in her "Rocky"
scrapbook layouts  4
Scrapbook Layout
The cutie has grown up into a 7 year old who decided to embellish the layout with a momma and baby frog!
scrapbook layouts  5
Scrapbook layout
The adorable windmill and trees are foam stickers. We added a die cut fence and some punched flowers .
The embossed “Happiness” is a new sentiment Die from Spellbinders.
scrapbook layouts  6
Scrapbook layout
Here is the front page of the spiral bound scrapbook with a huge house foam sticker and silver peacock feathers.
scrapbook layouts  1
Scrapbook layout
The layout below has all foam embellishment [I am particularly fond of foam for its no crush and resistant to dirt qualities].
scrapbook layouts  7
Scrapbook layout
I love all the kiddy - style elements in this page..my daughter was very particular the bee and the aeroplane had clouds for company!
Though extremely simple…I hope you enjoyed these fun scrapbook layouts.
Linking to Lulupu ,Color conceptions, Catchy Challenges
Supplies : Dies : Marianne fence, Cheery Lynn grass, Cheery Lynn corn,Cheery lynn flourish,Memory Box snowflake, Ship, car, aeroplane are Spellbinders,Spellbinder peacock feathers.

Beaded Tree Tutorial

$
0
0
Beaded christmas tree
Beaded Tree Tutorial
Dear friends my 7 year old daughter is rather taken with beads these days and is forever making necklaces and bracelets [see her Beaded Necklace]..I caught the beading fever from her and tried to make a beaded tree using some seed beads I have had like since forever!
My beaded tree is rather amateurish so professional beading experts do forgive me but I was so  thrilled my experiment turned out ok that I am sharing the tutorial so that a novice with no beading experience whatsoever can make a beaded tree
How to make a beaded tree
This beaded tree  is quite simple and quick to put together ! Some of the leafy branches were made by my 7 year old and it took just approximately 1 hour to make the unadorned beaded tree!

Materials required for your DIY beaded tree

Beaded tree tutorial 2
Beaded Tree Tutorial
  • Seed Beads–whatever colour you want your tree to be
  • Wire -24 G or even thicker ones [of less gauge]– I worked with 24 G and it was quite easy to twist and bend.
  • Wire cutter or scissors.
Beaded tree tutorial 3
Beaded Tree Tutorial
Cut a piece of wire  16- 20 inches long[I didn't measure … I just cut wire of length from my fingers to my shoulder!] and  bend it in half
Beaded tree tutorial 4
Beaded Tree Tutorial
Thread 10 to 12 seed beads on the wire.. you don't have to count  but eyeball the length of the beaded area.The commonly available seed beads [unless you buy high quality expensive ones] generally vary in length in one packet and if you thread the same number of beads the length will vary .
Beaded tree tutorial 5
Beaded Tree Tutorial
Push the beads to the bent center of the wire
Beaded tree tutorial 10
Beaded Tree Tutorial
Cross the wires and twist to form a loop of the seed beads.Keep twisting to give the beaded “leaf” a stem. Make your stem as long as you want.
Tip: To quickly and easily twist -hold the beads and twist  rather than holding the wire and twisting
Beaded tree tutorial 6
Beaded Tree Tutorial
Thread beads in the same way on one arm of the wire
Beaded tree tutorial 11
Beaded Leaf Tutorial
Bend the wire at the length you want the leaf to branch out and holding the beads in your hand twist to form a looped leaf like before.Keep twisting till the wire reaches the earlier leaf’s stem.
Beaded tree tutorial 12
Beaded Leaf Tutorial
Thread beads on the other half of the wire in the same way and twist to make one more beaded leaf
Beaded tree tutorial 7
Beaded Leaf Tutorial
Twist the 2 arms of the wire to a length you want . If you want add more leaves on each arm of the wire as before.
Beaded tree tutorial 8
Beaded Leaf Tutorial
You can make a conical “Christmas tree” type of tree by adding leafy branches of different stem lengths and having different number of leaves.You can make  three or four “2 leaf” branches and add them to your 3 leaved top branch.
Beaded tree tutorial 13
Beaded tree Tutorial
Decide how much down the top branch you want the next layer of branches and twist on the leafy branches one by one .
Beaded tree tutorial 9
Beaded Tree Tutorial
So your tree is already shaping up! Add branches with more leaves or longer stems as you go down the tree trunk.There is no hard and fast rule on lengths and number of leaves on how to make your tree..I experimented  quite a bit and my tree turned out different every time and it was fun!
Beaded tree tutorial 1
Beaded Christmas Tree 
You can make a loopy base for your tree with wire [rather tricky !] or insert your tree trunk in play dough/clay  like I have done here.
Beaded tree tutorial 16
Beaded Christmas Tree 
The base of my beaded tree is a plastic play dough container which I dressed up with washi tape, lace and rhinestones.To cover up the play dough I poured a generous amount of white glue over it and covered it with pearls.Can you see the "snow" on the rim of my tree base?
Beaded Christmas tree
Threaded a flower head and a red bead on a pin head and looped them on my beaded tree.I don't know if they look like cherries or Christmas tree ornaments!
Beaded tree tutorial 17
Beaded Christmas tree
Die cut 2 stars from silver glittery foam and stuck a loop of  wire between them.Twisted the star atop the beaded Christmas tree.
DIY Beaded Tree
Here is a sneak peak of the snowy Christmas Diorama I used the beaded trees on [will share soon]
These easy to make Trees would look fabulous as home decor and if you sell your crafts  I bet these would be a big hit [but caution you need to pack them well and maybe use thicker wire otherwise the branches can get squished!]
Do tell me how this simple tutorial was.
Supplies:Beads, Wire , wire cutter,head pins, flower caps,pearls,Rhinestones-Itsy Bitsy.
Linking to Itsy Bitsy [Inspired by colors in the picture],BGC [Chirstmas tree  is a gift],Decorate to celebrate[Christmas tree],Sisterhood of crafters[handmade],Use it tuesday 68 [hoarded stash is the seed beads which I have been hoarding for a year now!],Artsy Craftsy Dec

Beaded ChristmasTrees Diorama

$
0
0
Christmas diorama
Christmas Trees Diorama
Dear friends Thank you so much for the wonderfully uplifting comments on my Beaded tree tutorial.I used the beaded trees to make a  Christmas diorama by recycling an old cardboard box.Wrapped the box in festive papers and added  a glittery Santa in a sleigh pulled by reindeer ploughing through snow!
Beaded tree 1
Foam crafts
Made a snow laden silver fence [cut from foam and mounted on acetate] with a candy cane and a shimmery white reindeer who even has a golden bell around his neck!Created a snow laden  Christmas landscape with snowtex
Beaded tree 14
Foam crafts
The red berries on the holly leaves strewn all over my Christmas diorama are called “manjadi kuru” in my native malayalam language.A little bit of snow really jazzed up this old Christmas bell ornament I had.
handmade christmas ornaments
Christmas diorama
Kept the smaller beaded tree simple and planted it in snow[ white playdough covered with snowtex!]Framed the Christmas tree with silver scrolls cut from foam
beaded trees
Beaded Christmas Tree 
Many friends commented in my earlier post that the beaded trees must have taken time to make ..actually I was surprised that they took much less time than some cards!!
Beaded tree 10
Christmas diorama
The photo above captures the shimmering magical glitter of Santa and his reindeer!
Beaded Christmas Tree 
I hope you liked this Christmas Diorama Decor piece with easy to make beaded trees.Here is the link to the  Beaded tree tutorial and " pinnable "image on how the beaded tree was made
Beaded tree tutorial
Supplies : Dies: Spellbinder Lacy heart,Sizzix Santa and reindeer,Sizzix star [all from Itsy Bitsy],Marriane fence-Priya’s Craft shop. Snowtex –Lulupu.Beads, Wire , wire cutter,head pins, flower caps-Itsy Bitsy.White foam reindeer-Itsy Bitsy.Manjadi kuru- garden!Pattern Paper- Itsy Bitsy

Linking to Itsy Bitsy [Inspired by colors in the picture],Unstampabelles,DRS designs[99-glitter],Paper crafting journey[christmas time],Decorate to celebrate[Christmas tree],BGC [Chirstmas tree and diorama are a gift],Fab n Funky [196 frost],Inky impressions [winter/snow 137,Sisterhood of crafters[handmade],LEJ 82[ Christmas is coming],Try it on tuesday[handmade gift],Pinkgem 1082 creative chicks,Love to create 94 [3 D or gift],Beckie's Linky Party,Paper Issues

How to make Foam Jewellery

$
0
0
Foam rose
Foam jewellery
Dear friends Thank you so much for the wonderful support on my beaded trees diorama.I love to work with foam and foam crafts seem to be very popular nowadays since of late I  get a lot of traffic both from google and my Pinterest boards for foam crafts [surprising isnt it?]!
The best thing about foam is you can crush it ,bend it and even squish it without damaging it! Its washable too and so easy to cut.
Sharing how I made some fun jewellery using foam .

How to make a foam rose pendant

Add caption
Make your foam rose with thin foam using either Foam rose tutorial 1 or Foam rose tutorial 2.Make a calyx from thin green foam and attach it to your foam rose.
Foam crafts 1
Foam crafts
Use thick foam of any shape [I die cut a star shape ] to form the base of your foam craft pedant or earring
Foam crafts 4
Foam jewellery
Use something [I used a metal wire stick] to pierce a hole a few millimetres from the edge of your foam shape. Insert a jewellery ring into the hole.
Use the glue gun to stick your foam rose to the base and your Foam rose pendant is ready. I added a generous layer of glossy accents to give a plastic like shine to my foam pendant!
DIY foam jewellery
Foam jewelry

How to make  foam rose earrings

Foam crafts 2
Foam jewellery
Make a foam rose pendant as above and attach to an earring finding using more rings.I added pearly leaf danglers using head pins.
I added “diamond dust” to the tips of the star base of the  Foam rose earrings.
foam crafts
Foam accessories

How to make a Foam –Lace bracelet

Cut a strip of foam [use thick variety foam] as long as you want your bracelet to be [find the length by wrapping loosely around your/ daughter’s wrist] .
Foam crafts 3
Lace bracelet
Cut a piece of lace 2 inches longer than your foam strip.Stick the foam strip to the centre of the lace using the glue gun.Turn over and glue the excess lace to the back of the foam.
Foam crafts 5
Lace bracelet
Pierce the edge of the foam strips and add jump ring to one end and a clasp to the other end. If you wish you can use modpodge to get a seal over your lace bracelet.
Since this foam jewelry set is a handmade gift -for a bit of added glamour I hung the earrings on lacy hearts cut with Spellbinder dies.
diy foam jewellery
Foam jewellery
I hope you liked this easy foam jewelry tutorial.
Supplies Foam-Big market Sahakaranagar,Itsy Bitsy,Jewelry findings-Itsy Bitsy,Lace-Commercial street Bangalore,Sizzix star die-Itsy Bitsy.Spellbindres Lacy hearts-Itsy Bitsy
Linking to Itsy Bitsy [Inspired by colors],BGC,Try it on Tuesday,Inkpirational 45,Hiding in my craft room 127,Diana's Dec party,Beckie's Dec linky

Star Shaped Box Tutorial

$
0
0
Star shaped box 1
Star Shaped Boxes
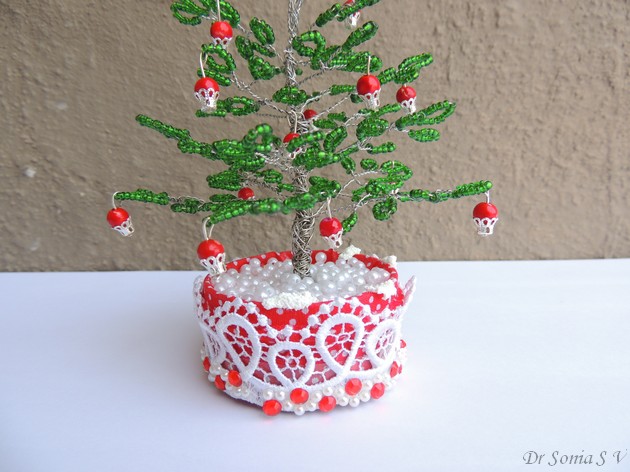
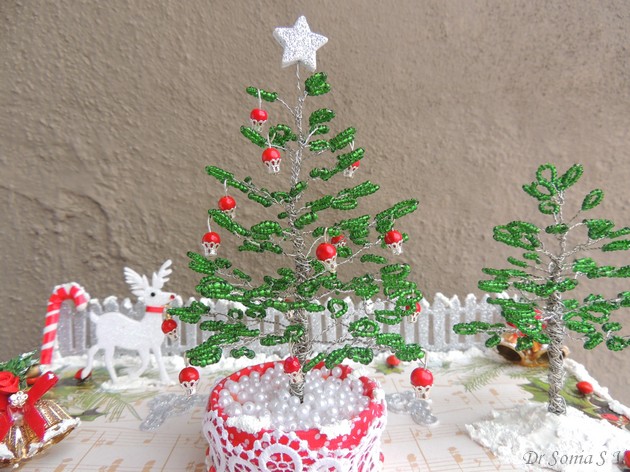
Dear friends Thank you so much for the support on the Beaded Christmas Tree  diorama.Thrilled to say it came top 3 in 3 separate challenges! This is yet another handmade Christmas tree project!
This stacked Star shaped boxes Christmas tree is my Guest DT project for Lulupu's bloghop [Recipe :pattern paper,die cuts,punches,embellishments]
I had earlier posted a DIY photo frame set with a star shaped box.So many of you asked for a tutorial to the star box…that was nearly a year ago!!Well finally I got around to writing up a tutorial for the star shaped box!
I stacked  5 star shaped boxes  [packed with little gifts of course!]to make a Christmas tree.
Star Box 9
Star Shaped Boxes
How to make a Star shaped Box
Star shaped box 1
Star Shaped Box tutorial 
  • Stars-You need a star template – Hand cut,Punch or Die cut 4 stars.
    • You can either make all 4 stars the same size or cut out 2 stars to be slightly larger in size [will show you why soon].
    • Cut out the star shapes from thick card stock to make sturdy boxes
    • My smallest star has a side only  slightly more than 1/2 inch
      Star shaped box 2
      Star Shaped Box tutorial 
  • Card Strip- Cut from thick card stock
    • You need 2 card strips to make the base and lid of your star box.
    • The length of your card strip will be 10 times the side length of your star + 1/2 inch.
    • Width depends on how high you want your star boxes to be.I kept mine 1 inch high and so my card strip was 1 inch + 1/4 inch for tabs.
  • Optional Decorative strip– optionally use pattern paper,ribbon,lace or washi tape to decorate your boxes. I used a strip of pattern paper  1 inch wide to wrap around my star box.
Star shaped box 3
Star Shaped Box Tutorial
Score your card strip lengthwise at 1 inch leaving 1/4 inches to create tabs.For larger stars you can keep your tab width at 1/2 inch [that is use a card strip of 1.5 inches wide]
Star shaped box 4
Star Shaped Box Tutorial
Score [mark deeply with a blunt pen or bone folder] and accordion fold your card strip as shown above at intervals equal to the length of your star side.You’ll need to make 10 “sides” plus a 1/2 inch tab for gluing.
Star shaped box 5
Star Shaped Box Tutorial
At the accordion fold lines on the 1/4 inch part of the strip you had earlier scored off ,snip off triangles.You will create gluing tabs to help adhere the card strip to your star .
Star shaped box 6
Star Shaped Box Tutorial
Fold these gluing tab wedges at 90 degrees.
Star shaped box 7
Star Shaped Box Tutorial
Apply glue on the gluing tabs one by one and stick under a star to snugly fit along the side of a star.
When you are gluing the tabs you may notice a jutting portion of your glue tab as shown above..snip that off so that your next glue tab can snugly hug your star![Just a little trick to get a neater star!]
Star shaped box 8
Star Shaped Box Tutorial
Keep gluing all your tabs one by one.Spend some time to make sure each tab adheres well to your star otherwise your box will fall apart and you’ll be cursing  in despair!
The final 1/2 inch glue tab on your card strip can be stuck either inside or outside the star box.If you are going to use pattern paper to line the outside of your star box stick the tab outside as the pattern paper will hide it.
Star shaped box 9
Star Shaped Box Tutorial
This is how the under surface of your star box will look once all the tabs are glued.You can adhere a same size or a slightly bigger star atop it.
Star shaped box 10
Star Shaped Box Tutorial
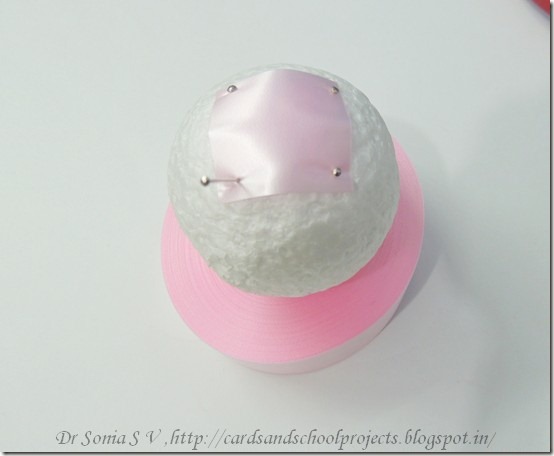
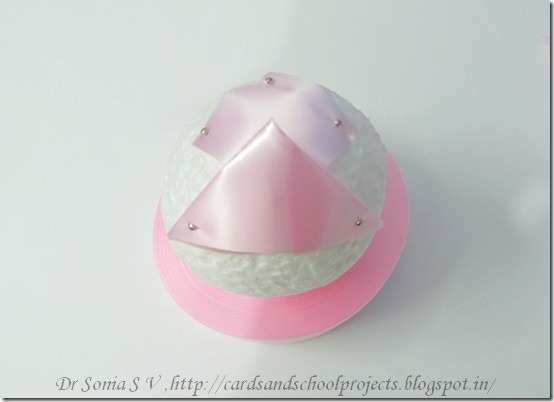
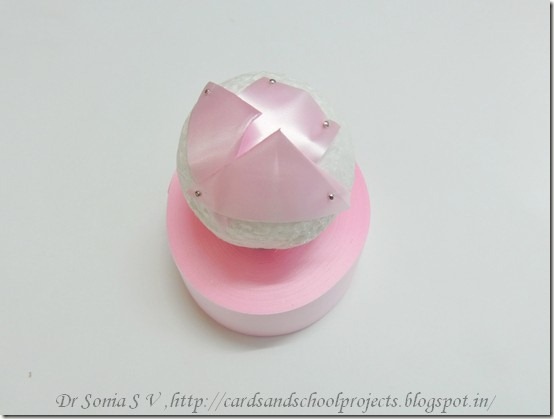
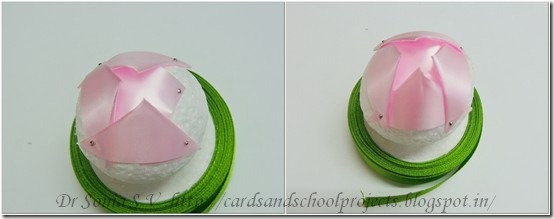
To line your star base with pattern paper simply apply glue and wrap it around creasing along the points as you go along with your nails to keep the star points sharp and crisp!
Here are  the 3 sizes of star shaped boxes and their lids.Well how do you make the lid you may be wondering! That is the best part…you can make it in exactly the same way using the same dimensions!
Star box 8
Star Shaped Boxes 
The star shape allows a lot of leeway and you can manipulate 2 similar sized star bases to make one the base and one the lid of your star box.
So you don't actually have to break your head calculating how many millimetres more to make the lid!
You can of course make your lid to be shorter as I had made in my first Star shaped box project
Star box 5
Star Shaped Box 
Here is a close-up photo of  the lid of my star shaped box.In these boxes I glued a star of slightly larger size  on the basic star box.Using a larger size star adds a bit of extra dimension and also serve the practical purpose of making your boxes easier to open!
If you want to handcut your stars you can  use this stacked stars template.
In the picture below you can see the smallest star box serving as the base of my Star Box Christmas tree.
Star box 1
Star Shaped Box 
I used lots of tiny star shaped brass beads on my boxes in keeping with the starry festive theme!I placed my Christmas tree on lacy heart Spellbinder die cuts [I love this die and you can see more in my Foam jewellery tutorial ]and also placed a lacy heart atop my Star Box christmas tree .
Star box 2
Star Shaped Box 
Made the wooden bead -cloth doll into a fairy by gluing on feather wings and a shimmery flower and pearl beads to her waist.
Star box 7
Star Shaped Box 
I hope you liked this tutorial to make a star shaped box.Apart from serving as a gift box and decor piece you can use your star box as a shadow box [use an OHP to make the lid ]or even personalise it to showcase a favorite photo.
Star box 4
Star Shaped Box
Dont forget to participate in the  Lulupu Bloghop— 2 lucky people who leave comments along the hop  will win some amazing prizes + 1 lucky hopper can win a Martha Stewart punch from Lulupu! Thank you so much Karuna for inviting me to be part of your awesome celebration.
Linking toItsy Bitsy ,BGC [Handmade gift],Dream Valley challenge 72[christmas],Glitternsparkle 63,Fairy tale 82 Box ,Card making mammas 77 [christmas,new year],Delightful sketches red and green,Jelly park christmas,Totally Gorjuss 214 special christmas,Craftin desert divas,Squirrel and fox 59 Christmas,Songbird 30 Christmas,Scrappers delight 13,Parade your crafts 10,Crafty boots christmas,C is for challenge 12[traditional christmas],Unstampabelles,Anything but a card, Craft your passion 193,The craft place,My mums craft shop,Country view challenge

Supplies:Dies : Sizzix stars,Spellbinder lacy hearts-Itsy Bitsy.Punches -MS heart-Mansi,Pattern Paper- DCWV botanical ,Feathers,Butterflies-Itsy Bitsy.Beaded Lace and star beads- local Fancy store Sahakaranagar
Viewing all 609 articles
Browse latest View live