Quantcast
Channel: Cards and Crafts
Viewing all 609 articles
Browse latest View live

Panda Craft Tutorial

$
0
0
Panda Bear Crafts
Panda bears are so fascinating and we keep making all kinds of Panda bear crafts at home.Sharing how we made an easy "Panda on a Bamboo" Penstand. This one is  probably one of my all time favorite kids craft project because it was so quick and easy .
Panda Bear Crafts
Materials Required
Anything cylindrical  to recycle:Tin can , glass jar,  tissue roll,Cardboard container etc.We recycled a tin can to make  our penstand.
To make the Bamboo : Use any green/ yellowish green material to line your cylinder-Card stock / Foam / Felt or even cloth. We used foam...I find its easier to maintain when you have a forever dust accumulating roadside house!
To make the Panda:Card stock / Foam / Felt.We used foam...its a fantastic medium to use when crafting with kids as you can wipe off finger stains,glue stains,food stains and whatever else little fingers will contribute !
To cut :Scissors /Punches/Dies - Simply hand cutting would be the fun and easy way to make this project but since I have a die cutting machine I used dies to cut out oval and circular shapes to make our Panda. I let my little one decide the shapes and sizes of the body parts.
Adhesive:This is the most important factor to make a quick , easy and mess free foam craft project! You can use anything which little hands can peel off easily such as double sided foam tape,double sided cellotape [my favorite as its adhesive properties are much better than the foam tape] or glue drops
Panda Bear Crafts
We lined the the edges of the green foam with double sided cello-tape [bought locally] and stuck it on the tin.I also stuck a strip of  the cello-tape on the inner top edge of the tin and folded down the foam as shown to give a neater edge to our Bamboo penstand !
Recycling Crafts
We roughly played with our cut circles and ovals.Do ignore our scallop edges....[I only had scallop dies and not the regular circle and ovals!] My daughter complained our Panda looked like a flower!
Panda Bear Crafts
My little one assembled the face using glue drops [ glue drops are a lifesaver when crafting with kids!].Our Panda's ears and snout are scallop circles and the black eye is actually a flower !! Proper circles and ovals would be a better choice to make a Panda !
Panda Bear Crafts
To raise the snout we layered 2 white circles on Panda's face.
Panda Bear Crafts
We wanted to raise the body off the Bamboo stand so we used sticky foam tape on the circular black body of our Panda foam craft.
Panda Bear Crafts
We used ovals for the arms and legs of our foam craft Panda.
Panda Bear Crafts
Our Panda looked glum without a smile!
Panda Bear Crafts
So my little one added a rosy red tongue and a paper umbrella.
Panda Bear Crafts
We had also made some Panda pencil toppers in a similar way using smaller parts but I think the dog ate it![Just joking...its lost somewhere in our super messy house!]
Here are links to some more Panda bear crafts
Panda Bear Pop up card tutorial
I hope you enjoyed this easy foam craft..do share your comments.
Supplies: Foam: Spar Mantri mall,Big shot[Die cutting machine]-Itsy Bitsy,Dies:Couture creations Scallop circle-Itsy Bitsy,Sizzix Oval scallop -Priya Color conceptions,Googly eyes-Commercial street,Paper Umbrella -Raja Market
Linking to Tuesday Alchemy[Anything but a card],Amanda's Thoughtful Thursday

Panda Paintings

$
0
0
Dear friends in my last post on Panda bear foam craft I mentioned how fascinating I find Panda Bears..I was delighted that many of you share my love for Pandas.
Panda Watercolor Painting
Sharing 2 paintings of Pandas done quite some time back[before my little one was born !]This one is a watercolor painting done using instructions from a book[sorry cant remember the title]
Panda Watercolor Painting

The interesting forest background texture was achieved by painting with salt! 

Panda Glass Painting
The mamma -baby Panda pair is a glass painting ...such a soothing medium to work with.Design is a freebie from the net [lost the links as this was again done years back ]
Please do forgive the "amateur" standard of the paintings...I have no formal art  training and these were just experimental fun projects ! 

Thermocol Crafts - DIY Snowman

$
0
0
Thermocol craft snowman
Christmas has come a bit early to our house this year...Though I am not a Christian from childhood we have celebrated Christmas and courtesy studying abroad and in Christian schools I know more about Christmas than about some of our Hindu festivals! 
Sharing a fun and easy thermocol[Styrofoam] craft snowman
Materials required to make a super easy Thermocol craft Snowman
thermocol snowman
Thermocol Crafts
  • Balls in 2 sizes:Use thermocol[styrofoam] or plastic ball
  • Rhinestones/Beads/Buttons - to make the eyes,nose and body decor
  • Ribbon/Paper -to make a scarf for the snowman
  • Hat- optional..you can cut out a cardboard or paper hat or recycle a used toothpaste cap for it.
  • Adhesive---The glue gun is fantastic to glue Thermocol.If you use the regular white glue you need to be really patient[which few little ones are]
I stuck the 2 thermocol balls using a blob of hot glue and handed it over to my kiddo to make her version of a snowman!
Thermocol Crafts
My 6 year old used sticker rhinestones to make the eyes and nose of our snowman. My daughter just had to peel it off the plastic and stick it to the thermocol balls.At the important age of 6 years it was a big deal for her that she designed her own snowman !
Thermocol Crafts
Little ones have very definite ideas and my 6 year old insisted our snowman didnt need the conventional hat!
Thermocol Crafts
This was a family project with my mom chipping in by adding the scarves for our thermocol snowman!
Thermocol Crafts
These snowmen are very very special to me not only because 3 generations [me,my kiddo and my mom] helped make it but also because they were made with gifts & winning from blogger friends[Kitty & red polka dot ribbon from Romina; red glitter ribbon from Khalindi,pearl lace from Kelli,heart stones from Khushboo,Plastic bows from Pie Lane sponsored Indira's challenge win]
Supplies:Thermocol Balls from Itsy Bitsy,Glue Gun : electrical shop in Ebrahim Street Bangalore,Rhinestones: Big Market Sahakaranagar, Bangalore
Linking to Spark your Creativity,Forever friends

Punchcraft and Quilled Flowers on Handmade Photoframe

$
0
0
This year I have embarked on an ambitious project ..to make photo frames as christmas gifts for all 10 of my daughters teachers! My 6 year olds teachers this year are a real boost for my crafty ego as several of them thought I was a professional crafter who took classes...had to laughingly tell them I was a surgeon whose hobby was crafting!! 
So if time permits I hope to make 10 handmade photoframes[Here is the link to the photoframe tutorial].
Punchcraft roses
Jazzed up a glitter paper die cut vine using some  mulberry rose style flowers  made with  punchcraft.
Quilled flowers
After ages made some  quilled flowers.
Quilled Photoframe
The black background design is a Tim Holtz sign die over which I layered punchcraft flowers
Punch craft roses
 This type of  6 petal punch rose is the easiest punch craft rose!
Punchcraft flowers
 I am so in love with the CheeryLynn butterfly die.
Die cut Butterfly
Shall soon share the punchcraft rose tutorial
Paper roses
Linking to BGC,Crafting for all seasons[flowers],Flutterby Wednesday 216[punches/dies],DL art Thankful Thursday,Tuesday Alchemy 42,Party Time Tesday 96,Decorate to Celebrate 39,MIM,Diana's Thankful Thursday Linky
Supplies : Dies : Tim Holtz Sign [Itsy Bitsy],Cheery Lynn Butterfly[Priya],Cheery Lynn fanciful flourish[Priya]Marianne Leaves [Priya]Punches : Jef 6 petal, Jef 5 petal.Glitter Paper [Itsy Bitsy],Rhinestones[Gift from Romina],Corrugated Paper [Spar,Mantri Mall Bangalore]
Edited:This project came Top 3 at BGC color drop challenge

Beyond Grey Challenges

Paper Rose and Rosebud tutorial

$
0
0
Punchcraft flowers
As a Christmas gift for my daughter's teacher we made a handmade recycled photoframe and matching star shaped gift box .
Punchcraft flowers
We decorated our photoframe with handmade paper rosebuds and punchcraft roses
Punchcraft flowers
The golden dots on the house ,fence and lacey hearts are bindis [fashion accessories!].Wrapped half a punched flower on flower pollens to make the tiny flower buds.
Punchcraft roses
The photoframe is a recycled craft[Click here for photoframe tutorial]
Handmade photoframe
To jazz it up a bit in the festive spirit added glitter glue on the leaves and vines of the punchcraft roses.
Punchcraft flowers
Making the mulberry type punchcraft roses used in these projects are a bit tricky and I didnt want to flood this blog post with the pictorial photos so made a slideshow tutorial .Please click on the little triangles to advance to the next slide of the punch craft rose and rosebud tutorials.
Tips to make a good rose and rosebud[This applies to the flowers in this tutorial only]
Paper: Paper chosen is of the utmost importance here.I found thin punch craft paper gave better results than cardstock as you need a bit of malleability.Some punchcraft paper  does not stick easily...such papers will be a nightmare to work with ..experiment.
Glue: I used Fevicol MR. 
Dont use runny glue...it should be a bit thick...if your glue is fresh and runny...put a big blob on a plastic/other surface and let it thicken for some time before you use it.
Glue gun will scorch your hands[I tried ..so beware of shortcuts in this particualr punchraft rose!].
Your glue should not be very fast drying as you need a bit of time to mould and arrange the petals.
Use the bare minimum of glue or your bud will be a squishy ball!
Here is the closeup of the matching star shaped box
Star shaped box
Used the new Itsy Bitsy dies [love them] to make the hanging drop border on my star box
Star shaped box
Added the same flourish vine ,MS lacey heart and silver die cut butterfly on the lid of the star shaped box.
Star shaped box
Shall soon share the tutorial to make thestar shaped box
Linking to Crafters Corner, Itsy Bitsy,Glitter n Sparkle[flowers],Pan Pastel[gifts],Sketchy color,Cheery Lynn[Happy Holidays],Cardz Tv 20,Diana's Dec linky
Supplies: Dies: Cheery Lynn Butterflies [Priya],Cheery Lynn Fanciful flourish [Priya],Couture creations oval[Itsy Bitsy],Sizzix Star[Itsy Bitsy],Itsy Bitsy Deckle Lace,Marianne Fence & bird house [Priya]Punches : Martha Stewart deep edge heart, Jef 5 petal medium retro,Jef 5 petal pointed medium,Jef medium daisy,

Handmade Photoframe and Gift Box

$
0
0
Handmade Photoframe
This handmade photoframe and gift box is yet  one more addition to the series of Christmas gifts I am making this year for my daughter's teachers.
Recycled a desktop calendar to make the handmade photoframe adorned with punchcraft flowers
Handmade Photoframe
Here is the closeup of the quilled flower.

Quilled Flower
I dont usually make stuff in "orange" but somehow used all orange colored punchcraft flowers. 
Handmade Photoframe
Made a simple matching oval shaped gift box
Oval shaped box
Kept the box fairly simple using just a few elements to match my photoframe
Oval shaped Box
I didnt take photos while making it,  but it was fairly simple to make the oval shaped box.
Oval shaped Box
Do tell me whether you liked this matching gift set of a gift box and handmade photoframe 
Handmade Photoframe
Supplies: Dies: Couture creations oval[Itsy Bitsy],Itsy Bitsy Deckle Lace,Marianne Fence [Priya],Marianne Leaves[Priya]Punches : Punchbunch Sun, Jef cosmos,Jef 6 petal pointed medium,Jef leaves,Misc:White flowers gift from Jovita, Hearts [Pie Lane]
Linking to Crafters Corner, Itsy Bitsy,Crafting for all seasons 41,Scrap creations[anything but card],Penny's challenges 105,Paper minutes[home decoration],Tuesday Alchemy 43,Totally Stampalicious[anything but a card],Diana's Thankful thursday

Interactive Card and Photoframe tutorial

$
0
0
Handmade photoframe
This is a gift set [for my daughter's teacher] of an Interactive Photoframe[has a shaker snow-globe] and an interactive window card.
Interactive card
The little reindeer slides to and fro across the snowy scene on pulling and pushing the side wings of the interactive card.
Interactive window card
I first saw this type of card by Jennifer on you tube [yes now that my computer is behaving I can see You tube videos though i cant sit through most of them!][Thank you Chrissy for the link...you are the best!]
Materials required
This is a super fun and easy card to make.
  • Sturdy Card stock: Your card will be subjected to quite a lot of pushing and pulling so good sturdy card stock is a must! You need 2 pieces of same size. I used 2 cards of 6 x 8 inches in this interactive card tutorial
  • Something to measure and score : You can use a scale and blunt used pen .I have used a scorpal. This is one card where you need to be accurate to get the fold right!
  • To cut a window : Its perhaps easiest to use a Xacto knife to cut out an aperture .I used dies and a big shot[one is obliged to play with new toys!]. 
  • Good strong adhesive : I found white glue[Fevicol MR] the best as it doesnt dry too fast and you can play around with the position of your interactive elements and correctly position the 2 parts of your interactive card.
How to make an Interactive Window Card
Take 2 pieces of same size card stock [mine 8 x 6 inches].Score 2 ends at 1 inch from the edge and then at 1/2 inch from this score line you made as shown.For those with a scorpal this translates to score at 1, 1 1/2,6 1/2 and  7 inch.You can play around with your measurements according to your card dimensions and what depth you want to give the window card.
Interactive Window Card Tutorial
Cut out an aperture on one of the card pieces positioning your aperture well within the inner score lines of your window card.
Interactive Window Card Tutorial
After cutting the window,valley fold the outer score lines and mountain fold the inner score lines as shown in the interactive card tutorial

Interactive Window Card Tutorial
Both card pieces are actually folded the same way...you just have to flip over one so as to be able to lay them on each other as in the photos of the interactive card tutorial
Interactive Window Card Tutorial
Build a 3 D or flat scene on the uncut card panel and choose an interactive element.Stick your interactive element on a long piece of sturdy cardstock
Interactive Window Card Tutorial
Experiment with the positioning of your interactive element and how it looks through the window of your interactive card.
Interactive Window Card Tutorial
Once you are happy with the position ,apply glue on the outer edges[your 1 inch panels],stick on your interactive element and the window cut part of your interactive window card.
Interactive Window Card 
Dont add heavy embellishments on the top panel of your window card.
Since I was gifting all the teachers photoframes this year, made a matching photoframe with a an interactive snow globe shaker.
Interactive Photoframe
To make a snowglobe shaker you need Card stock, a thick transparency[or acetate], double sided foam tape ,an image[stamp , sticker etc] and a shaker element [you can use beads,sequins or tiny thermocol balls like i did here]
Snowglobe shaker
Cut 2 similar sized circles from card stock.
Cut out an aperture from the center of one circle. Cutting out circles is a bit tricky with the xacto knife so you may "cheat" and cut a square!
Cut a transparency slightly larger than the aperture and stick it on the reverse of this window card using double sided foam tape[you can stick it in such a way that it overlaps the transparency and the cardstock]
Snowglobe shaker card
Add your shaker element and stick onto  the other circle in which you made a snowy scene.[The toughest part for me was to get the thermocol balls to stay in place and not fly all over the room!]
Making the snowglobe was so fun...I confess I will miss playing with it when we gift the snowglobe!
Snowglobe shaker card
I dont know if this type of interactive card and frame will appeal to an adult but my daughter [just 6 yrs] likes it so much she wants to gift it to her favorite teacher!

Linking toBGC,Itsy Bitsy,Crafters corner,Crafty Sentiments[Snowflakes],Party Time Tuesday 98 kids,Papertake weekly [snow white],Loves rubberstamps[let it snow],Incywincy[christmas with snowflakes],Lexis creations 80[snow],Forever friends[Christmas cards],Unstampabelles [christmas],Squirrel and the fox[summer/winter],Dream Valley challenge 47,Sunshine creations [snowflakes],Digi Darla 41 [snow n bling],Christmas card challenges[die cuts],Totally Gorjuss 161[oh no snow]
Supplies :Dies: Couture Creations frame[Itsy Bitsy],Itsy Bitsy Circle,Itsy Bitsy Deckle die,Sizzix scallop oval[Priya]Embossing Folder[Itsy Bitsy],Foam Reindeer[Itsy Bitsy] Punches: Jef Snowflake,Jef Fleur di lis,MS deco Ribbon : Gift from Khalindi.Thermocol balls:Big Market Sahakaranagar[local supermarket]

Pop Up Christmas Card Tutorial

$
0
0
Pop Up Christmas Card
This year my 6 year old has 10 teachers and I am making special cards for each of them! I had lots of fun [and a bit of hair pulling moments !!] designing this pop up Christmas card. 
Pop Up Christmas Card
This card has a variety of pop up mechanism[V folds, Box designs and Spring pop up mechanisms]
I designed the pop up house with my Scorpal using ideas from Birmingham's book "pop up".[This pop up house is a slightly complicated design so sharing the link to my simpler Pop up house card tutorial]
Pop Up Christmas Card
The Xmas trees behind and in front of the house are simple V fold pop up mechanisms.The reindeer sleigh and snowman also pop up by a V fold pop up mechanisms.
Pop Up Christmas Card
The V fold is described as an easy pop up but its not my favorite as it often gives me hair pulling sessions !! I often make mistakes in its angulation [and my pop up doesnt pop nicely] or height and placement [and my pop up juts out of the card]
Pop Up Christmas Card Tutorial
For pop up enthusiasts who face similar issues :Experiment with the position and angulation of the folded pop up element on the card before any gluing.Once happy...ie folded element is well within the closed card...glue the tab of one half and then apply glue on the other tab and fold the card over...this way you have a smarter V fold Pop up card!

Now lets put aside the difficult pop up mechanisms for afun and easy pop up card tutorial
The star,bunnies,xmas robin and Xmas tree near the robin all pop up by a Spring pop up mechanism
Pop Up Christmas Card Tutorial
The spring pop up mechanism is super easy to make.
Take a strip of sturdy thick card stock .Score and fold or simply accordion fold a strip of card .My score lines are at 1/2 inch intervals
  • width of paper strip = less than the width of your pop up element 
  • length of paper strip = depends of how much spring you want to give your pop up.
Pop Up Card Tutorial
Attach the folded spring as shown to your pop up element.Gluing position of the spring on the pop up element is important.I wanted just a gentle up ward pop for my star so glued the spring near the center of the star.
This is how the star springs up in the  pop up Christmas card!
Pop Up Christmas Card
On the Robin I added more accordion folds and attached it towards the base of the Christmas robin so as to make it stand more upright on the pop up card.
Pop Up Christmas Card
The Xmas tree near the robin also is popping up by the spring pop up mechanism
Pop Up Christmas Card
Since the V fold pop ups were so taxing I generously used the spring pop up mechanisms to make up my scenic Pop up Christmas card.
Pop Up Christmas Card 
I know many people are daunted by the prospect of making pop up cards but I am sure you would have loved this spring pop up!Do tell me what you think!

Supplies : Graphics : Navneet Publishers Punches used on Pop up house : Martha Stewart.Paper of house roof top [Itsy Bitsy] Dies : Sizzix star [Itsy Bitsy] Blue Stamp pad used to distress edges of star and V fold for snowy scene[Itsy BItsy] Stickers: Santa and Snowman [ unknown company][Sahakaranagar,Bangalore Fancy Store],Sentiment and corner flourish[Shilpi] [Devi & Co Ebrahim Street]

Linking to ICRC 24,Joanna Sheen[with love at christmas],All Sorts Challenge[christmas tree],Winter Wonderland[Christmas tree],Forever friends 51

Fancy Fold Pop up Card Tutorial

$
0
0
Fancy Fold card
I had a ball incorporating pop up elements into this fancy fold card.
Fancy Fold card
This is how the card looks closed.This card is inspired by my friend Merry's zig zag card.Hers has more folds,a belt and is much more elegant than my fancy fold pop up card.
Fancy Fold card
 Fancy Fold Card Tutorial
This is a super easy type of card to make and for those who make elegant cards..this has such a lot of potential. I unfortunately dont make good elegant cards perhaps because my assistant and critique is 6 years and almost all the cards we make are for her friends or teachers!!
Fancy Fold card tutorial
Choose a rectangular piece of card stock..mine is 6 x 12 inches
Any length  you fancy will work...easier if its a multiple of 3 as you will have to divide it into 3 equal parts!
Since mine is 12 inches long...I  first divided [scored] it into 4 inch segments.
Then score a line to halve the outer 2 segments as shown above.
This translates into Score at 2,4,8 and 10 inches if you have a scorepal
Fancy Fold card tutorial
Measure around 2- 2.25 inches above the lower border of the card at either end and join to the top of the 4 and 8 inch score lines as shown by the white arrows.Chop off the  outer triangles as shown.
Fancy Fold card
Accordion fold as shown in the picture to make your Fancy Fold card !
Fancy Fold card
I added a Santa and a truck on each of the inner folds of the card to make a double pop up card.
Blogger pals are the best and some such as Merry, Loz ,Helen and Hussena keep inspiring me again and again and I keep wishing to replicate everything they make!!.Thank you so much ladies!
Also a special Thank you to all my blogger pals for dropping by and constantly encouraging me by leaving wonderful comments.
Linking to Top Tip Tuesday 92 [Tip is the tutorial],Deep Ocean Challenge 41[Santa is coming to town]Forever Friends Dec,Cutie Pie Challenge 33,Unstampabelles 18,Here come the boys 42,Squirrel and fox 33,Paper shelter 93,Whoopsidaisy[traditional xmas],Christmas blog challenge[christmas tree],Quirky crafts 26,Hooked on craft 27[christmas],Dream valley challenge 47
Supplies :Punches: Martha Stewart, Dies : Itsy Bitsy Deckle Border.Graphics: Stickers bought locally Cardstock :Staples.Paper -White  floral pattern paper Itsy Bitsy

Recycling Crafts-Calendar Recycling

$
0
0
Pop up Christmas Card
Wish all my blog friends and readers a happy New Year.Sharing a winter theme Pop up  card .
Window Card
Die Cut a window and popped it above a winter scene with accordion folds.
Window card
Recycled a gorgeous old calendar with sparkling shimmery pages to make the winter scene window card.
Recycling craft
On the inside I added tabs to  a fireplace image [ from birdscards] and made it into a pop up card.
Pop up Christmas Card
The glittery red border was cut with a gorgeous die manufactured by our own Indian Itsy Bitsy [so proud that finally  dies are being made in India!!]PS: not getting any incentive for writing this -- I just like to support  local brands and craft shops .
Pop up Christmas Card
I have used the negative of the die cut as a border on the lower border of the card.
I was so crazy busy in December I didn't even post a single card to friends or family !!Feels so bad as a card maker when that happens! Also blogging had become such a " feel good" therapy that I was starting to get withdrawal symptoms from not blogging...does that happen to you ....?

Supplies : Dies : Cheery Lynn Window[Crafters Corner],Itsy Bitsy Deckle Border,Couture Creations Victorian Frame[Itsy Bitsy] Stickers : Shilpi Border and sentiment , Itsy Bitsy Foam Stars & Unbranded Stocking, Card stock : Staples
Linking to Crafts & Me [Winter Wonderland],Bearly Mine 67 [Something old: The border and sentiment stickers,Something new :Cheery Lynn Window Die],ABC Challenge 10[Shiny Sparkly],Card mania 11[winter wonderland],Forever Friends F 52

Interactive Pop Up Scrapbook

$
0
0
Pop up Scrapbook
I have never made a scrapbook layout before so please do forgive me for all the deficiencies ! I have been so inspired to start scrap-booking by my blogger friend Snehal who makes  "scrapbooks full of love"!!
Tentatively venturing into this new hobby with what I am familiar with ...Interactive and Pop up Mechanisms ! 
Pop up Scrapbook
I created a pop up bed with toys , bed sheet and a spring up pillow to match the colors and the theme of my little one's picture in this first Interactive Scrapbook.
Pop up Scrapbook
I used some pretty papers and glitters foam flowers from Itsy Bitsy as "wall paper " for my "Baby on Bed" Pop up Scrapbook!
Foam Flowers
Used scallop circles and circles to make a Punch craft Pram
Punch craft Pram
I added a swinging butterfly on a flower to hide some journal-ling on the Interactive Scrapbook.
Interactive Scrapbook
The butterfly on the flower swings around on a flower brad on this interactive mechanism.
Interactive Scrapbook
The bed and toys in front of the baby pop up by a pop up mechanism as in this Pop up card Instructions
The pillow springs up by the spring pop up mechanism as in this pop up card tutorial.
Pop up Scrapbook
The photo is of my daughter when she was 5 months old at the toothless stage!! She was a chubby cutie pie!
Pop up Scrapbook
I was so unsure and hesitant about scrap booking but the subject of the photo my now "grown up" 6 year old made things easy by choosing the photos and theme and literally bulldozing me into starting a new hobby!
Please do leave your comments...as so unsure ...
Supplies : This is literally an Itsy Bitsy Project as nearly everything is from there or a gift from Blogger friends. Dies : Cuttle bug Butterfly, Sizzix Flower,Spellbinders Baby [Teddy bear]
Also Indian crafters do drop by my friend Sindhu's blog as she has a fun die cuts giveaway.

Castle Shaped Box and Castle Card Tutorial

$
0
0
Castle shaped card and box
Dear friends this project is part of a "Birthday Celebration" set I made for my Guest DT post at my favorite craft store Itsy Bitsy. The theme is weddings and celebrations.  
At this stage in my life what we celebrate the most is my daughter's birthday.Last year we had a Rapunzel themed birthday party and I concentrated so much on the party decoration that I didn't give much thought to invitation cards or party favor boxes.
At 6 years birthdays are very important for her and all year long we have discussions on whom to invite [the list keeps changing weekly],what cake to make, what games to play etc etc !! 
Princesses , Castles ,Pink and Purple are in vogue with my kiddo right now so sharing our pink and purple castle shaped invitation cards and castle shaped box
Castle shaped Box
Castle Shaped Box Tutorial
Materials required
Card stock - avoid handmade paper but use card stock
Adhesive : White glue. If you want to make lots of castle shaped boxes quickly or want to craft with kids use double sided adhesive wonder tapes[also called tissue tapes] for the boxes and glue dots for the lids.
Scoreboard and scoring tool- optional...If you have it you get nice crisp folds easily and measuring is easy too.Otherwise use a scale and ball point pen.
Square punch-a must have unless you want to hand cut all those squares!
Castle Shaped Box Tutorial -Please click on the picture for the details[I have changed the view option to decrease page load time]
You can jump directly to the box template or follow the steps on how I create it...then you can customize it to the size you want.
Castle shaped Box
I started out with an A 4 card and scored it every 2.5 inches[my box width] If you have a score-pal that translates to score at 2.5,5,7.5 and 10 inches.Then flip it and score at 5 inches if you want the box 5 inches tall.Score again at a 2.5 inch interval to get the base of the box
Castle shaped Box
Keeping approx 1 inch around the base square as shown chop off the extra card and snip off wedges as shown.
Castle shaped Box
Fold along your score lines and apply glue or double sided tape [in white] as shown on the tabs.
Castle shaped Box
I tried to make the base at different sites but if you make it in the style shown...its super easy to assemble the box by just peeling the tape and sticking in a step wise fashion as above.
Castle shaped Box
It was so quick & easy that my daughter exclaimed that it was "easy peeasy" in typical kiddo slang!
To make the lid for the 2.5 inch wide box I used a 4.5 + 1/8 inch square card stock.Scored all around at 1 inch to get a lid that was of 1 inch height.Cut along the blue lines as shown.
Castle shaped Box
Formula for lid of any sized box = a + 2 b +1/8 inch.Score all around by "b".
a= width of box ;b =height of lid.
Castle shaped Box
Snip off wedges on the tabs to get a better looking box lid. Again sharing a tip to make it easy as well as save time..use glue dots/drops.I used to use Fevicol's glue drops but the size is often larger than what I require and I often have to cut it to size plus the paper is opaque so you cant really be sure where you are applying the dot..Fell in love with Itsy Bitsy's glue dots...which were so perfectly sized and  since the backing paper is clear you know exactly where you are applying the adhesive!...A big bonus when working with kids!!
Castle shaped Box
To make the "castle like appearance" I punched a 2 x 11 inch strip card with the square punch.This gave an un-punched 1 inch strip on one side just right for my 1 inch height box lid.
Castle shaped Box
Scored the square- punched card and stuck it to our box lid.This step needs a bit of care so little hands may not be able to do it!
Castle shaped Box
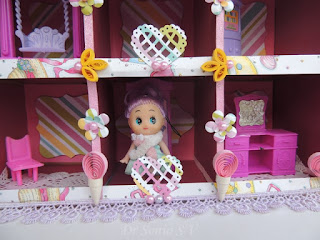
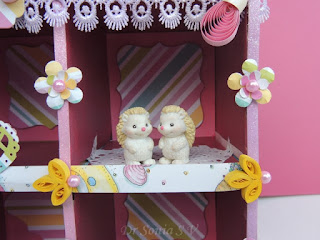
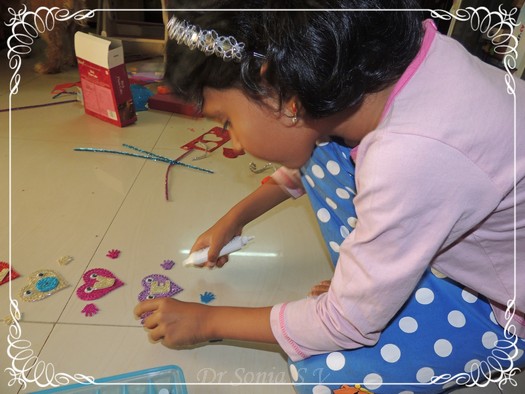
Here is my little princess with her castle shaped boxes .
Castle shaped Box
You could maybe personalize the return gifts writing each guest's name on his or her castle shaped box.
Castle shaped Box
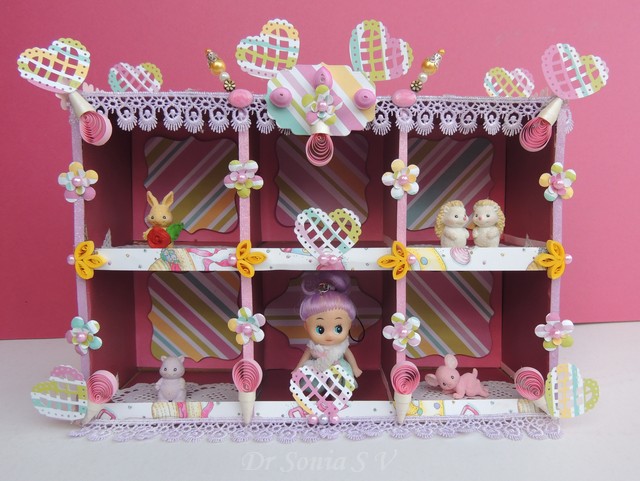
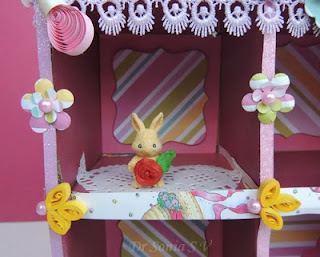
We added  pink and purple embellishments to our castle shaped box
Castle shaped Box
Made 2 smaller boxes using the same castle shape box template
Castle shaped box template
My  smaller box measuring 1.5 x 3.5 inches was made using a card 7 x 6 inches and scored 1.5 inches.
To use the template to make any size box :w = width of box,h =height of box and t = width of tabs[keep it 1/2 to 1 inch]. 
Width of card required = 4w +t.Height of card required =h+w+t
Width of punched square strip required=1 inch + width of lid of castle box 
Castle shaped Box
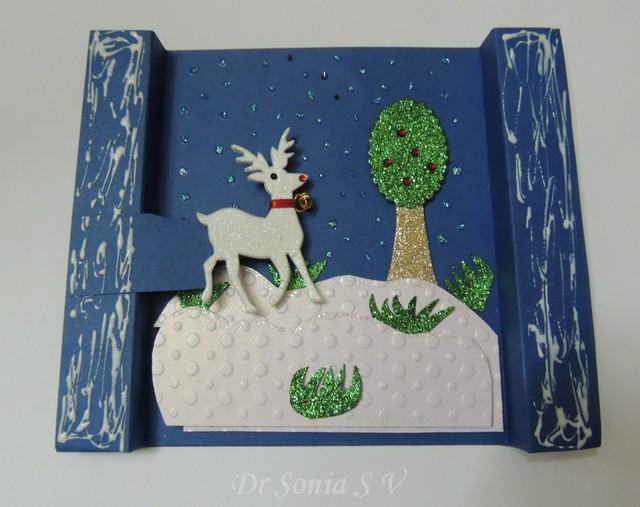
In keeping with the theme we made party invitation cards as castle shaped  cards.
Castle shaped card
I made a pop up slider card in the shape of a castle.The central fort of the castle can be pulled up to reveal a space to write the Invitation and party details.
Castle shaped card
Its actually rather easy to make simple or detailed castle shaped cards!
Castle shaped card 
For the Tutorial for this easy to make Slider pop up card do drop by my Guest DT Post at Itsy Bitsy
More links
Basic pop up slider card tutorial [the 1st tutorial on my blog....this one is the 111th!]
Other Castle crafts
Please do share your comments

Linking our  Castle shaped Box to Crafter's Corner
Entering the card and boxes to Unstampabelles
Supplies:Big Shot [Itsy Bitsy],Embossing folders : Itsy Bitsy spots folder , Itsy Bitsy swirls.,Cuttlebug tiny mosaics[Imaginations],Dies: Itsy Bitsy Venetian die and Scallop circles, Provocraft  Butterfly[Itsy Bitsy];Punches: square,tiara.Glitter alphas, GLitter strips,Boutique Butterflies,Wonder tape, Glue dots all from Itsy Bitsy

Fancy Fold Pop up Dangler Card

$
0
0
Fancy Fold card
This fancy fold card is the result of an experiment while playing around with punches and my scoreboard.This is how the fancy fold card looks when folded
Fancy Fold card
The window was cut with the Cheery Lynn Window die .Stuck punched butterflies on the back panel so that they pop from the window on closing the fancy fold card!
Fancy Fold card
Added spellbinder banner die cuts atop the window and more punched flowers
Fancy fold card
Layered the scallop hearts with foam tape for a more dimensional effect and added a lacy punched border.
Fancy fold card
Since this card is the result of an experiment I dont have tutorial photos to share.And measurements don't have much importance since they will vary based on what kind of border punch you want to use;so just sharing the general template for this fancy fold card
Fancy fold card template
After I had made this card I saw a beautiful heart punch card with a dangler on my friend Lisa's blog so I adapted her dangler idea into the folds of my card to make a dangling pop up card 
Fancy fold pop up card
I made the butterfly dangler by punching out 2 butterflies for each butterfly on the dangler.Applied glue to one butterfly.
Butterfly card 
Positioned the thread over the center of the butterfly and stuck another butterfly on top of it. Added 2 more butterflies and hearts to make one dangler .
Butterfly card 
Hung the thread from the lace heart which is stuck by a simple V fold pop up mechanism atop the embossed window .On opening all the folds, butterflies and hearts dangle from the heart arches of the pop up card
Fancy fold pop up card
Linking to Sisterhood of crafters[hearts],Crafty sentiments[white on white],Deep ocean 43[not square],Lexi's creations 82[fancy folds],Unstampabelles 19[Dies],For love of crafting[fancy folds love theme],City crafter 143,Top Tip Tuesday 94[layers],Hands 2 Hearts,Itsy Bitsy
Supplies:Dies: Spellbinder Banner 2[Itsy Bitsy],Cheery Lynn Window A[Crafters corner],Itsy Bitsy Deckle border],Nellie's scallop heart[Priya ]Punches: MS Deep edge lattice heart,MS double arches,Jef  pointed petal[Jovita],Jef Butterfly[Jovita],Jef heart[Itsy Bitsy] Cardtstock: pearl white[Itsy Bitsy]
Dear friends I went a bit crazy with white and all the punches and dies and my little critique is rather unappreciative about it..but please do leave me your comments!
Edited:This card came Top 3 at Crafty Sentiments white on white
Top 3 Banner

Handmade Interactive Calendar

$
0
0
Handmade Calendar
Dear friends as you may be knowing I love interactive mechanisms and when I saw an amazing Interactive calendar on my blogger friend Weis blog I fell so in love with it.
I wanted to make something subtle and not too lovey dovey for my hubby this valentine and this perpetual calendar to declare love all year round every year seemed just perfect! 
Handmade Calendar
The design[by Annette] is so clever that the month and dates change by rotating the circles on the central frame of the handmade calendar.
Handmade Calendar
The general concept is to avoid flowers in masculine themed gifts but my hubby loves flowers and so I assembled a 4 layered 3 D decoupage flower 

3 D decoupage
I made a lacey heart vase for the red rose using Martha Stewart punches.
3 D decoupage rose
The perpetual calendar has 3 panels and the central panel pops out so that its a free standing calendar.
Handmade Calendar
I painted an Itsy Bitsy chipboard floral vine with my daughter's poster colors and applied glossy accents over it to give it dimension and a lovely sheen.
Here is another view to show the dimensional nature of this handmade calendar.
Handmade Calendar
Since the design is not mine I cant share a tutorial but I hope you liked this Interactive calendar idea as much as I did.
Supplies :Punches: Martha Stewart Deep edge lattice heart,MS punch around double loops,MS loops,Jef circle punch.Dies : Itsy Bitsy Venetian frame,Couture Creations Scallop circle,Itsy Bitsy Circle.Chipboard [Itsy Bitsy],3 D decoupage flower [sheet from Staples],Brads- Itsy Bitsy,Paper-mariposa from Itsy Bitsy.Green embossed one-a gift


Recycling Crafts - Foam crafts

$
0
0
Foam crafts
Foam crafts
I love to recycle tin cans into pen-stands and foam is my favorite medium for making everyday use objects as its easy to keep clean.You just need scissors and glue for making foam crafts
foam crafts
Foam crafts
Made a fairy land mushroom scene with textured and glittery foam
Foam crafts
Foam crafts
I hand cut and die cut the foam sheets to make the fairyland scene in this foam craft
Foam crafts
Foam crafts
This is a super simple craft but I had to share it just because of that.Please do share your opinion and experience with foam.
Supplies: Textured Foam sheets[local store Big Market Sahakaranagar],Glitter foam[Itsy Bitsy].Dies: Provocraft butterfly + flowers[Itsy Bitsy],Oval and circle Dies[Itsy Bitsy],Fence Marianne[Priya color conceptions],Doll [Raja Market]
Linking to 

DIY Fancy dress - the Papercrafter's way

$
0
0
DIY Animal costume
My daughter has a theme based "Show and Tell" in school every week .Recently the theme was domestic animals and my kiddo had me totally stressed out by saying they had to take "not store bought" animal costumes.
A home made costume meant stitching...I dont enjoy stitching..... [Those of you who know I am an ENT surgeon will be wondering "Don't surgeons have to stitch people up?" Ha Ha well my specialization within ENT is advanced endoscopic and microscopic "stitch-less" surgery !!]
So even though this is a crazy kinda post I had to share so that other "dont like to stitch" moms may benefit! 
Sharing the Paper-crafters  DIY  sheep costume tutorial!!
Sheep Costume tutorial

She had to wear the costume herself over her school uniform so recycling her father's old vest  would give us a  nice and loose costume.We made the sheep's fur using tissue paper and double sided adhesive tape [I love this adhesive]
DIY Fancy dress costume
Unfold the tissue paper and roll loosely.
Sheep Costume
Once you have a fluffy paper cylinder you can either roll completely from one end or roll simultaneously from both ends in opposite directions like I did here...this makes it super fast to make your DIY costume !
Sheep costume
The scrolls are firmly stuck down to the tissue using double sided tape
DIY costume
Just took a bit of rolling and sticking and we had our easy quick home made Sheep costume!
DIY Animal costume
My "perfectionist/ demanding" kiddo wanted a face mask for the sheep.Bat man fans do forgive me...I converted an old Batman costume mask [at 2 years my daughter was a superheroes fan] into a sheep by making the "up " pointing ears go down !
DIY Animal costume
Here is my little sheep in her homemade sheep costume!
DIY Sheep costume
The funniest part about this is that after her show and tell was over I came to know that the animal costume was just an idea her teacher had given along with ideas of bringing animal pictures or animal toys...trust my kiddo to choose the idea which had most appealed to her [meaning lets give  mom some work]!

Recycling Crafts - Valentine Shadow Box

$
0
0
Cardboard Doll house
Recycling crafts are a  passion of mine more so because it gets a lot of  appreciation from my hubby to whom most of my other projects merit just a "hmm"!
I made this shadow box for my "pattern paper theme" GD post at Itsy Bitsy. I hate to cut up pretty paper and to feel better about it, I converted a cardboard box into a shadowbox in this recycling craft
Recycling craft
I cut and glued the flaps of the box to make the compartment of my shadow box
Recycling craft
I used pattern paper to  line the compartments of the box in this recycling craft.
Recycling craft
Here is the side view of our shadow box
Shadow Box
My daughter claimed the shadow box as her Valentine present and promptly upgraded it into a doll house.
Doll house
On a die cut banner added some quilling and punchcraft flowers
Quilled Flowers
I really managed to stretch a single 12 x 12 sheet of pattern paper here..I die cut it, punched it, cut borders out of it and also used it to make punch craft flowers
Punchcraft flowers
My daughter loves all things cute and cuddly and she added some furry friends to the doll house
Doll House
My kiddo sculpted a "valentine" play dough rose for the bunny in her doll house
Playdough rose
We added a romantic pair of hedgehogs in one "room" of her cardboard doll house!
Shadow Box
I stuck a scallop and flowery border on the "terrace" of our recycling craft house
Shadow Box
Here is a closeup of the homemade stick pin
Stick pin
Most of you may be knowing how to make one..but I made my first pin only recently ..have shared the steps in my Itsy Bitsy GD post on this recycling craft .
Recycling crafts
Do drop by  my GD post at Itsy Bitsy for the full list of products and techniques in this shadow box
Shadow Box
Linking to Decorate to Celebrate 44, Crafters Corner,BGC [dont know if it qualifies for shabby chic but have tried to keep the colors pastel ,used striped pattern as specified and added lots of pearls and lace!],Fashionista 12,Unstampabelles 20,Paper playtime3[border punch used Ms heart],Anything but a card 12,Corrosive challenge 167,Crafty Sentiments[valentine],Top Tip Tuesday [Tip : dont throw away boxes...make them into shadowboxes or doll houses],Craft room [handmade embellishments: stick pins ,punchcraft flowers, quilling],Tammy scrappin corner 49[handmade embellishments: stick pins ,punchcraft flowers, quilling],Lexis 83,Craft your passion 149,Victorine stamps 52,Card mania 14,Squirrel and the fox 37

Heart Shaped Box with Fan Fold Tags

$
0
0
Heart Shaped Box
Dear friends I am not a big romantic but thoroughly enjoyed making this downright romantic heart shaped box.
Heart Shaped Box
Most boxes open from the top ,this heart shaped box swings open
Heart Shaped Box
You can add some candy or handmade flowers inside the heart shaped box.
Heart Shaped Box
I made an accordion of tag pockets to hold lot of tiny love letters to put inside my swinging heart box
Heart Shaped Box
The box halves are held in place with shimmery  ribbon threaded through brads on top of each half of the shaped box.
Heart Shaped Box
On untying the ribbon,the box swings open to reveal a fan fold of tags in pockets as in the view from the top of this handmade valentine box
Heart Shaped Box
You can take out the fan of pockets and take out each tag /love letter.I threaded a pearl string through the fan fold to secure it to my hand made box
Heart Shaped Box
Added a golden glittery peacock feather on the bottom of this handmade gift box.
Heart Shaped Box
I recycled the beautiful packaging of Itsy Bitsy flowers to make this box
Recycling crafts
I was fascinated when I saw this box by the Gentelman crafter and though he made his project in a ready made heart box ,I made mine from scratch using just card stock, glue and scissors in yet another recycling craft!
Recycling crafts
Have shared a similar box as my GD post at ICR. Will soon post the tutorial for this heart shaped box.
Heart Shaped Box
Apart from the recycling, this creation is not my usual style..so please do tell me how you like it.
Details:White flowers are parchment flowers I made, The pink rose is a baloon punchcraft rose.The stick pin is handmade.Punches used : MS double loops and deep edge heart.Paper used: Itsy Bitsy Cupid.Dies : Nellie Snellen hearts and Cheeryl Lynn Butterflies

Linking to BGC,Crafters Corner,Little scraps,365 days 45,Use it tuesday[I have used brads which I have been hoarding more than 6 months!]Art Impressions 100,Happy Campers 10,Its all about vintage 37,MAWTT,Papercrafting journey,Sarah Hurley 77,Decorate to celebrate,Craft room challenge[handmade embellishments are the stick pin , pink punchcraft flower and white parchment flowers],Tuesday Alchemy 50,Anything but a card 12,Celebrate the occasion 99,Divas by design,Crafty creations 209,Anything challenge 86,Ribbon Carousel,Top Tip Tuesday,Paper take weekly,LEJ Designs 40,Crafty Sentiments

Heart Shaped Box Tutorial

$
0
0
Heart shaped box
Dear friends I am overwhelmed at the response to my heart shaped swinging box..I never imagined you would like it so much!That shabby chic style heart box was not my usual style and my little 6 year old critique even told me "how dull it looks"!So to oblige my little daughter,for my GD for ICR ,made a more "kiddy style" swinging heart shaped box

Heart shaped box
I printed and cut several bear angels [images are a winnings from Nikki]and made a 3 D decoupage using foam tape.Added silver glitter on the angel bears to make them sparkle!
Like the earlier heart box, this one too is held shut using ribbons threaded through eyelets atop the heart shaped gift box
Valentine Gift box
On releasing the ribbon the box swings to reveal a silver butterfly[Cheery Lynn die cut] inside the heart shaped box.
Heart shaped box

Many of you commented on the earlier heart shaped box that it looked like a tough project.Once you read the tutorial and try it you will realize its actually easy and entirely doable!

Materials required :First of all Nothing fancyis required to make this box!You need just:
  • Card stock - the sturdier the card stock , stronger your box
  • Scissors
  • Glue -normal thick white glue is enough
  • Ribbon /twine /thread/rope - to hold the swinging heart halves together
  • Scoring tool -use a bone folder/used ball point pen/blunt knife to score and get a crisp fold.
Fancy optional tools: Glue tape,eyelets,Single hole punch, Dies + cutting machine and a scoring board.
  1. You need  to cut 4 hearts:Hand cut using a heart shaped template or die cut like I did.You can make all 4 hearts the same size or 2 larger than the other 2. My 2 base hearts are around 3 inches and the outer scallop hearts are slightly bigger.
    Heart Box tutorial
  2. Take 2 card strips and fold up a 0.5 inch strip lengthwise.For this box the strips are 1.5 inches wide and 5.5 inches long.The length will depend on you heart size so keep it long and cut short as required.If you want a box with more depth so as to add fan fold tags like in my first heart box use a card strip 2 inches wide.
    Handmade box tutorial
  3. Make zig zag cuts on this folded 0.5 inch edge as shown. More examples of Zig zag cuts in making shaped boxes : Pram shaped Box ,Wishing Well,CD recycling Box,& the Oval gift box
  4. Apply white glue or stick a double sided tape on the zig zag teeth and stick the teeth on the under surface of a heart starting from the top as shown in the handmade box tutorial.
    Heart shaped box tutorial
    You can decorate the inner part of the card strip and add a brad before you stick the strip or do it later.Stick the strip till the tip of the heart.
  5. Cut off the excess card at the tip of the heart box half in one half.Repeat step 4 and make another heart box half but this time chop off just the zig zag teeth jutting from the tip and cut leaving 1 inch of card strip beyond the tip of the heart box.Score and fold this card strip at the tip of the heart box.
    Heart shaped box tutorial
  6. Stick a same size / large heart on the other side of the box to hide the zig zag teeth .This can also be done later after completing the swinging heart box.
    Heart shaped box tutorial
  7. So you have 2 halves of your swinging heart box [made in step 5]which look the same except for the card strip flap on the tip of one half of the heart box.
    Heart shaped box tutorial
  8. Invert one heart box half as shown apply glue on the inside of the folded flap[I have shown it here without the heart atop the zig zag for better clarity]
    Heart shaped box tutorial
  9. Stick this flap to the other half of the heart box aligning the tips as shown and you've made a swinging heart shaped box!
    Swinging Box tutorial
  10. To give more strength to the hinge of the box ,add an extra piece of card stock at the tip of the heart box.
Gift box tutorial
You can punch holes and add eyelets on the hinge if you want to secure your fan fold tags like I did in  the first heart shaped box.
Heart shaped box
I have no photos of how I made the fan fold tags..they are easy but if anyone wants me to do a tutorial on the accordion fan fold tags do tell me in the comments.
Heart shaped box
Linking the Angel Bears Heart box to Glitternsparkle 21,Joanna Sheen layer it up,The craft place[valentine],Hot shot craft 15[not card],Forever friends 56 [bears]
Supplies : Nellie Snellen heat scallop die,Cheery Lynn Butterfly die[Priya]

Foam Crafts -Huggy Hearts

$
0
0
Foam Crafts
I am very lucky to have my mom stay in the flat next to ours and though I am "old and a big girl", I tend to rush to her with the slightest worry or problem .Also every evening my daughter gets to spend 2 hours at her grandma's place[that's my blogging time!]Recently my mom went on a religious pilgrimage and we missed her so much!As a "we love u" welcome back present we made these Foam Hearts.
Foam Crafts
These hearts were inspired by these heart crafts and we used glitter foam sheets, glittery pipe stem cleaners,googly eyes,foam punches,dies and magnets to make  our Huggy Heart Magnets.
Foam Crafts
I die cut the hearts and letters for my daughter though she is adept at using the big shot as you can see in this post on Ocean crafts.But she punched the foam hands on her own using her new Itsy Bitsy foam punch[If you have a child crafter buy lever type medium sized punches as they are so much easier for little hands].
Googly eyes crafts
I love foam crafts and the big pluses for me are that foam stays cleaner while crafting unlike paper[a big plus while crafting with kids] and lasts long.The big negative with foam crafts is what adhesive to use.Here my daughter is trying to glue her letters to the foam hearts but they kept swimming away![White glue on foam needs a lot of time and patience!]
Foam crafts
My 6 year old crafter is quite knowledgeable about adhesives now and she said "Amma can we use glue dots?"Using the glue dots her heart faces were all done in 10 minutes!
Googly eyes crafts
We tried pipe stem cleaner bodies and I was thrilled that she was able to twist and turn the chenille stem sticks herself!
Pipe stem cleaner crafts
And here is our first Huggy Heart using foam crafts.
Valentines crafts
We intertwined the sparkly hands and the feet and stuck them behind the foam heart
Foam heart doll
I used the glue gun to stick the foam hands to the pipe stem cleaners
Pipe stem cleaner crafts
My daughter had fun taking her foam heart people all over our house and here on our balcony is Mr L Foam heart man.
Foam Hearts
And this is the young crafter having fun playing with her foam craft heart people
Valentine crafts
I glued magnets on the heart people and Kuttu placed them on her grandma's fridge as a welcome home "Love U" Banner!
Foam Crafts

My mom came home last night and on being greeted by these Huggy Hearts, I dont know who was the happiest one -me ,her or my little daughter ! 
I guess we can celebrate Valentine's Day and Mothers Day all year long!
Supplies : Glitter Foam sheets,Googly eyes,Foam Punch,Glue dots,Alphabet die[Donna salazar]- Itsy Bitsy. Glitter pipe stem cleaners-Local shop Big Market Sahakaranagar. Heart Die -Priya


Viewing all 609 articles
Browse latest View live